A greenhouse can make a small backyard significantly more useful, but it does not need to be a large glass structure occupying half the property. For a beginner, the most practical greenhouse is usually the one that solves a specific gardening problem without creating a new maintenance project that is larger than the garden itself.
Some gardeners want to start tomatoes and peppers earlier in spring. Others want a protected place for seedlings, a way to keep salad greens growing longer into autumn, or somewhere to shelter tender herbs and container plants from cold weather. A small greenhouse can help with all of those goals, but the best design depends on how much space you have, what you want to grow, how cold or hot your climate becomes, and how much daily attention you are prepared to give the structure.
That last point is important because greenhouses do more than trap warmth. They also trap humidity and can become extremely hot in direct sun. Even a compact greenhouse can overheat quickly on a bright day, especially when ventilation is limited. In colder weather, the same structure can lose heat rapidly overnight if it has little thermal mass or insulation. A greenhouse therefore creates a more controlled growing environment, but it does not eliminate the need to monitor temperature, airflow, watering, and seasonal conditions.
For small backyards, efficiency matters even more. A greenhouse should not block your best garden sunlight, eliminate useful walking space, or become difficult to access once surrounding beds are full of mature plants. Structures that attach to walls, fit over raised beds, use vertical shelving, or serve more than one purpose tend to make the most sense where space is limited.
The twelve ideas below range from tiny beginner setups to more permanent backyard structures. Some are designed for seed starting, some for vegetables, and others for gardeners who mainly want to extend the growing season. The goal is not to build the largest greenhouse possible. It is to choose the smallest structure that reliably does the job you need.
1. A Lean-To Greenhouse Against a Sunny Wall
A lean-to greenhouse is one of the best options for a small backyard because it uses an existing wall as one side of the structure. Instead of creating a freestanding building with four exposed walls, the greenhouse is attached to or positioned directly beside the house, garage, shed, or another suitable structure. This reduces the amount of space required and can make the greenhouse feel like part of the backyard rather than a separate building dropped into the middle of it.
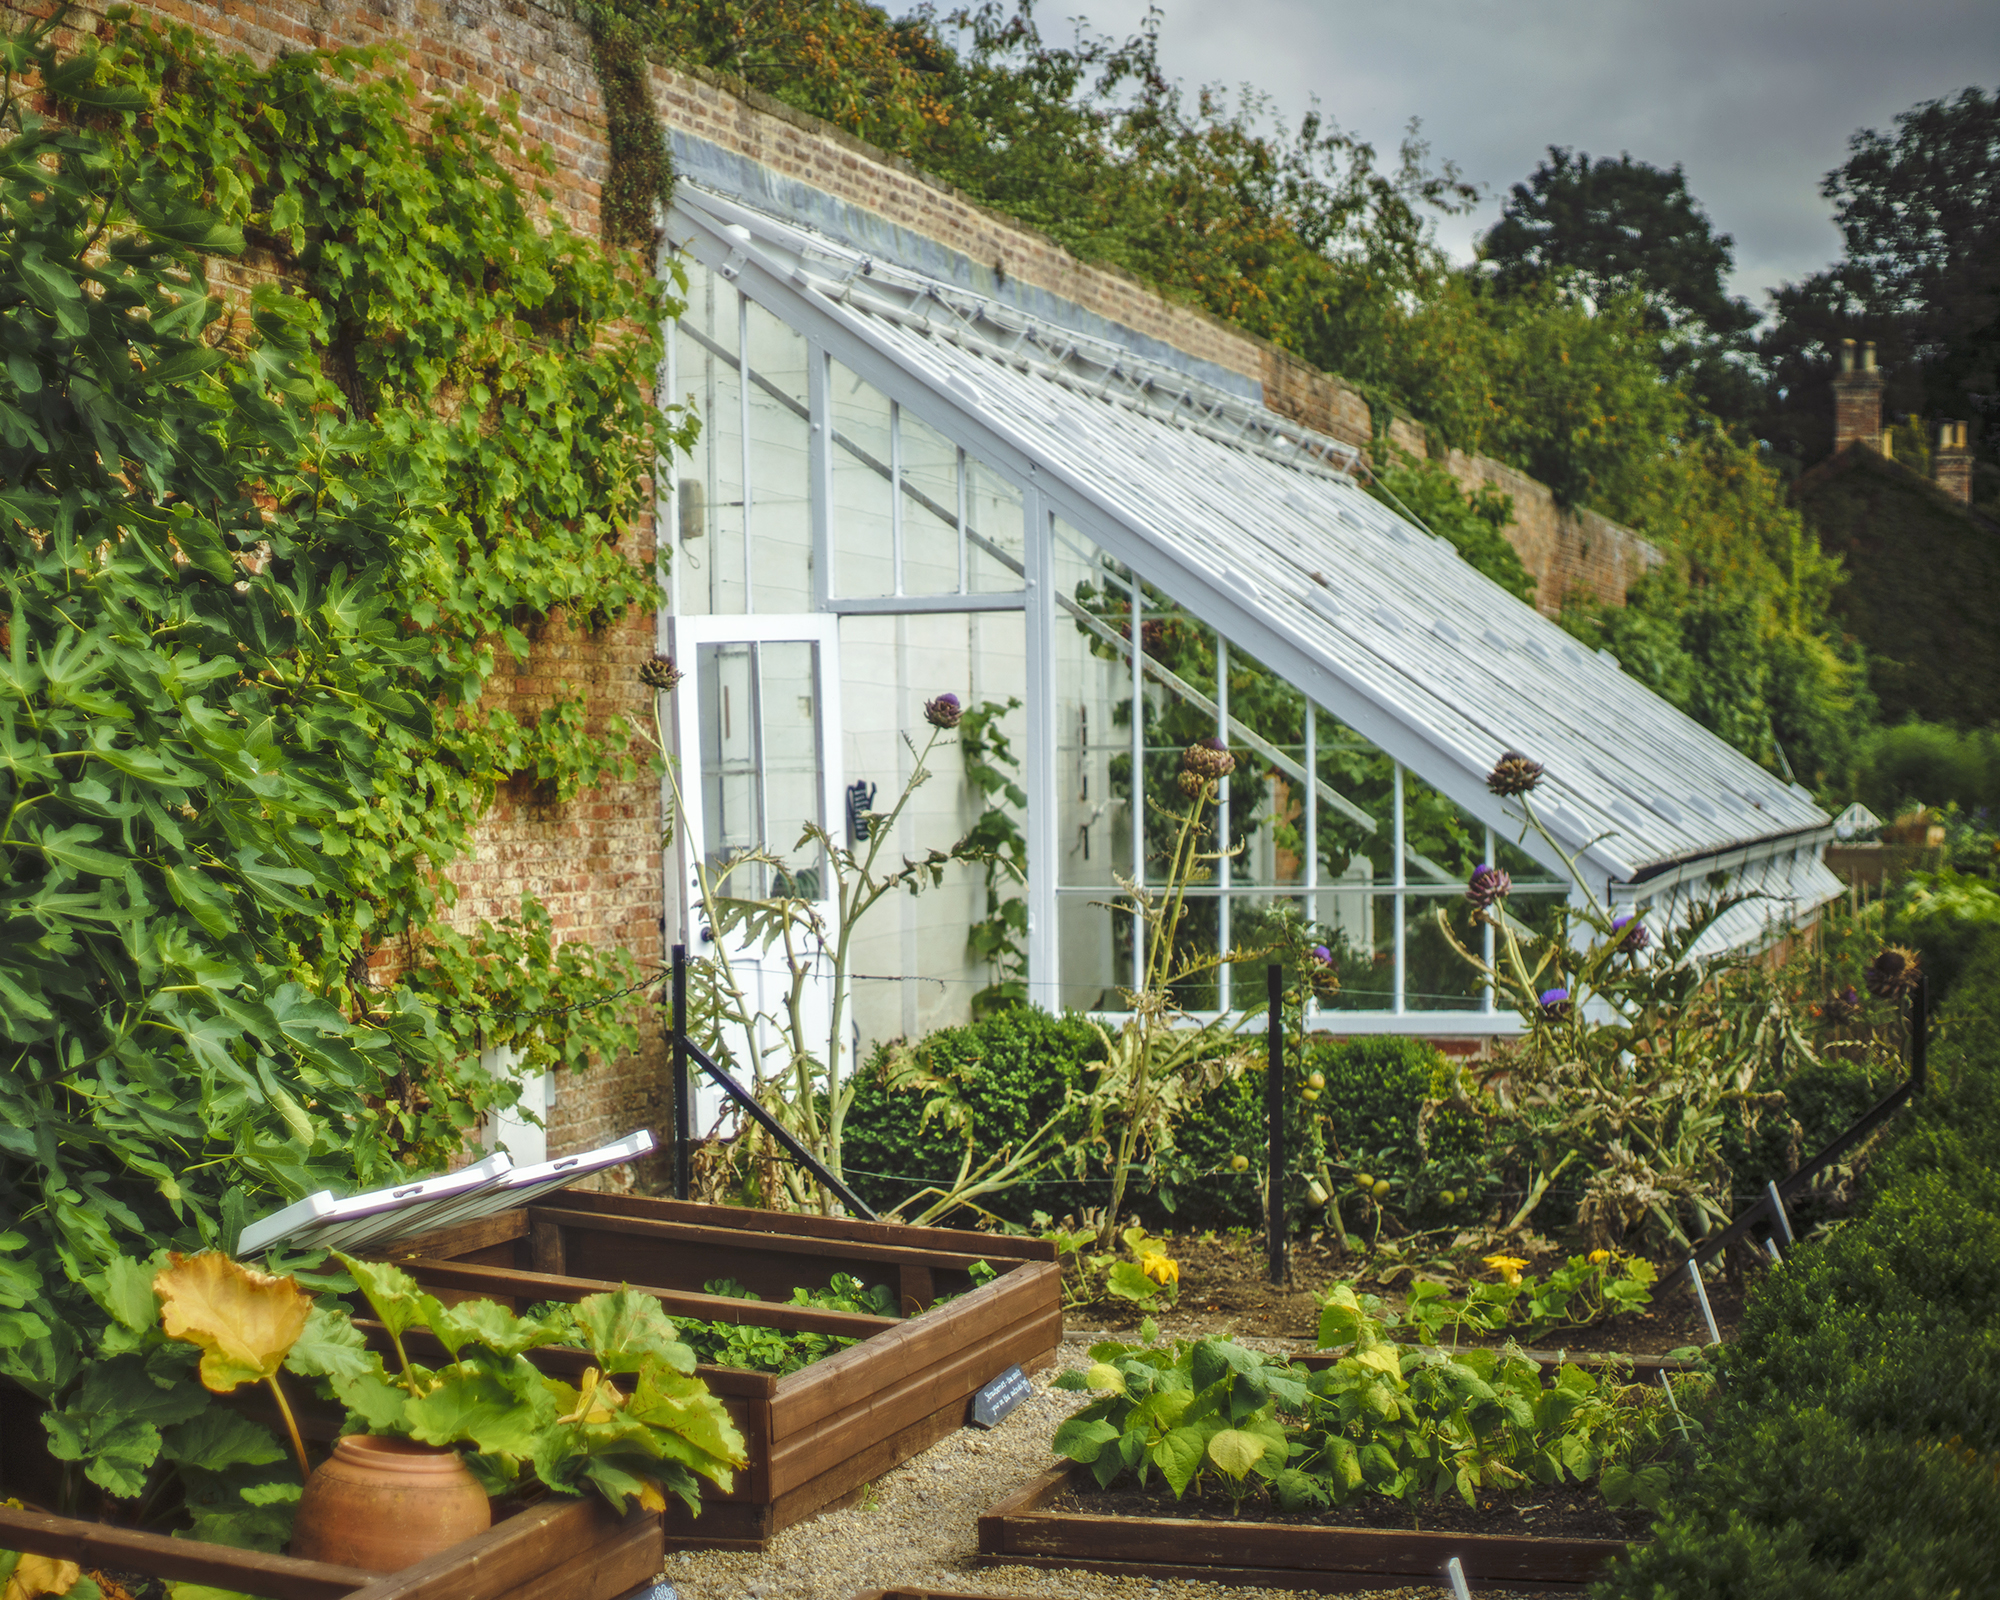
The wall can also influence temperature. Masonry walls can absorb some solar warmth during the day and release part of it later as temperatures fall, although the effect depends on the wall material, sun exposure, insulation, and climate. A south-facing location can be particularly useful in the Northern Hemisphere because it typically receives stronger winter sunlight, but nearby roofs, fences, and trees still need to be considered before deciding where to build.
A lean-to greenhouse is especially practical for herbs, seedling trays, leafy greens, and compact vegetable plants. Shelving can run along the wall while taller crops occupy the outer edge, allowing a relatively narrow structure to hold far more than its footprint suggests.
Ventilation is essential. Because one wall is solid, air cannot move through the structure as freely as it might in a freestanding greenhouse. Roof vents, operable windows, or a door that can remain open safely during warm weather can help prevent excessive heat buildup.
Best For
Small patios, narrow side yards, gardeners who want a semi-permanent structure, and anyone with a sunny wall that would otherwise remain unused.
2. A Mini Walk-In Greenhouse for a Patio or Small Yard
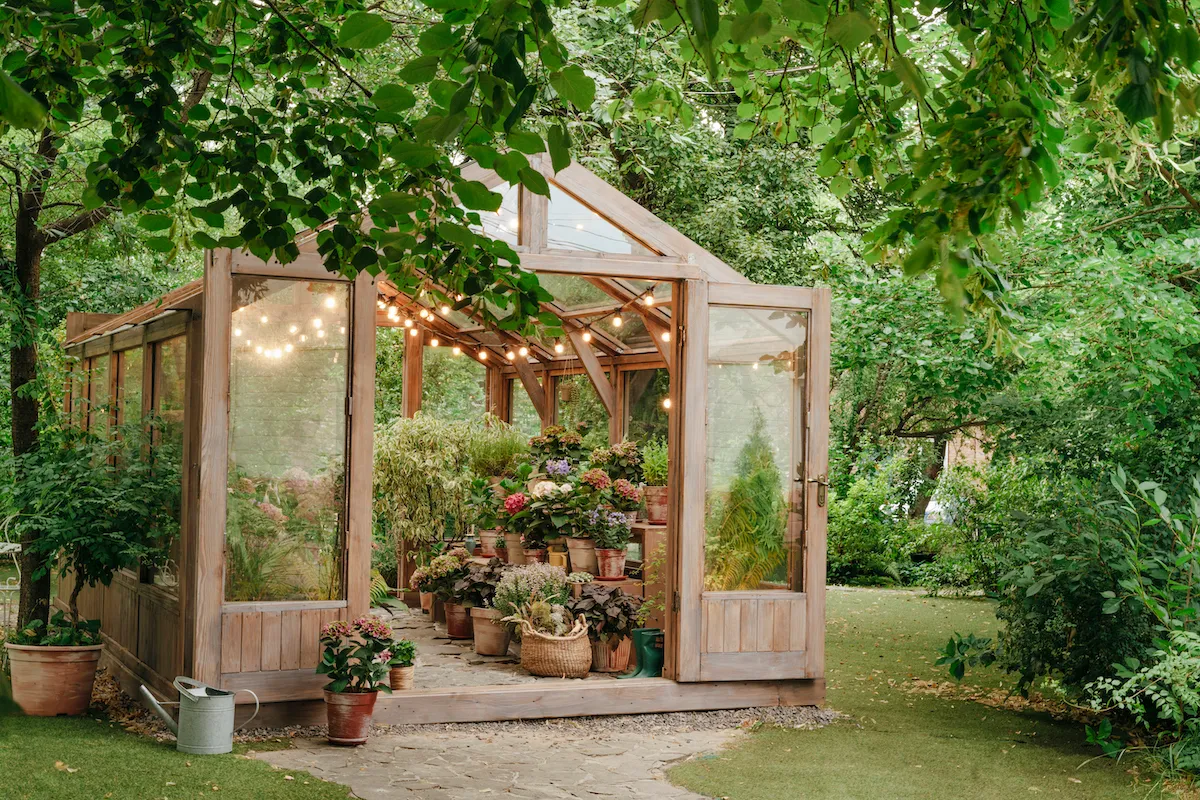
A small walk-in greenhouse offers the experience of a traditional greenhouse without requiring a large permanent footprint. These structures are often narrow enough to fit beside a patio, along a fence, or at the end of a small vegetable garden while still providing room for a gardener to step inside and work.
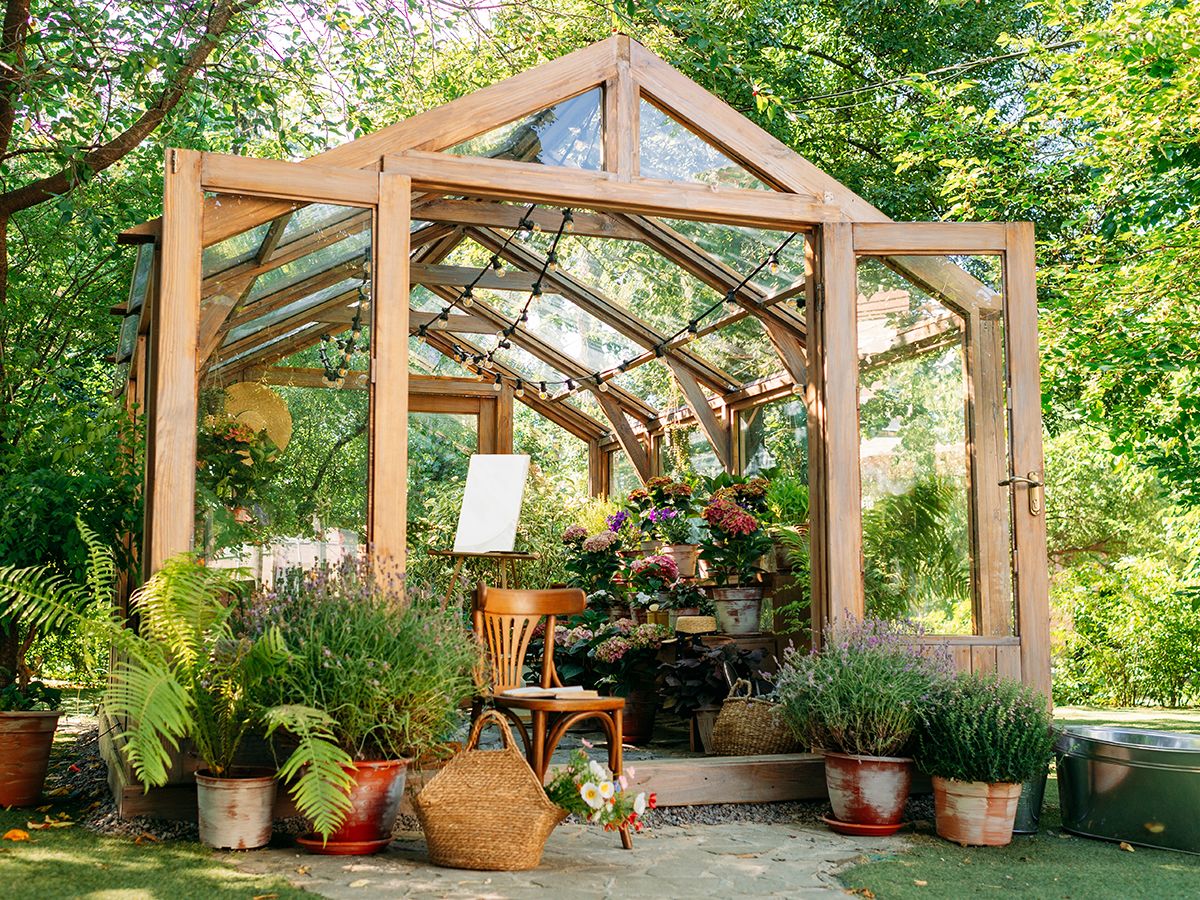
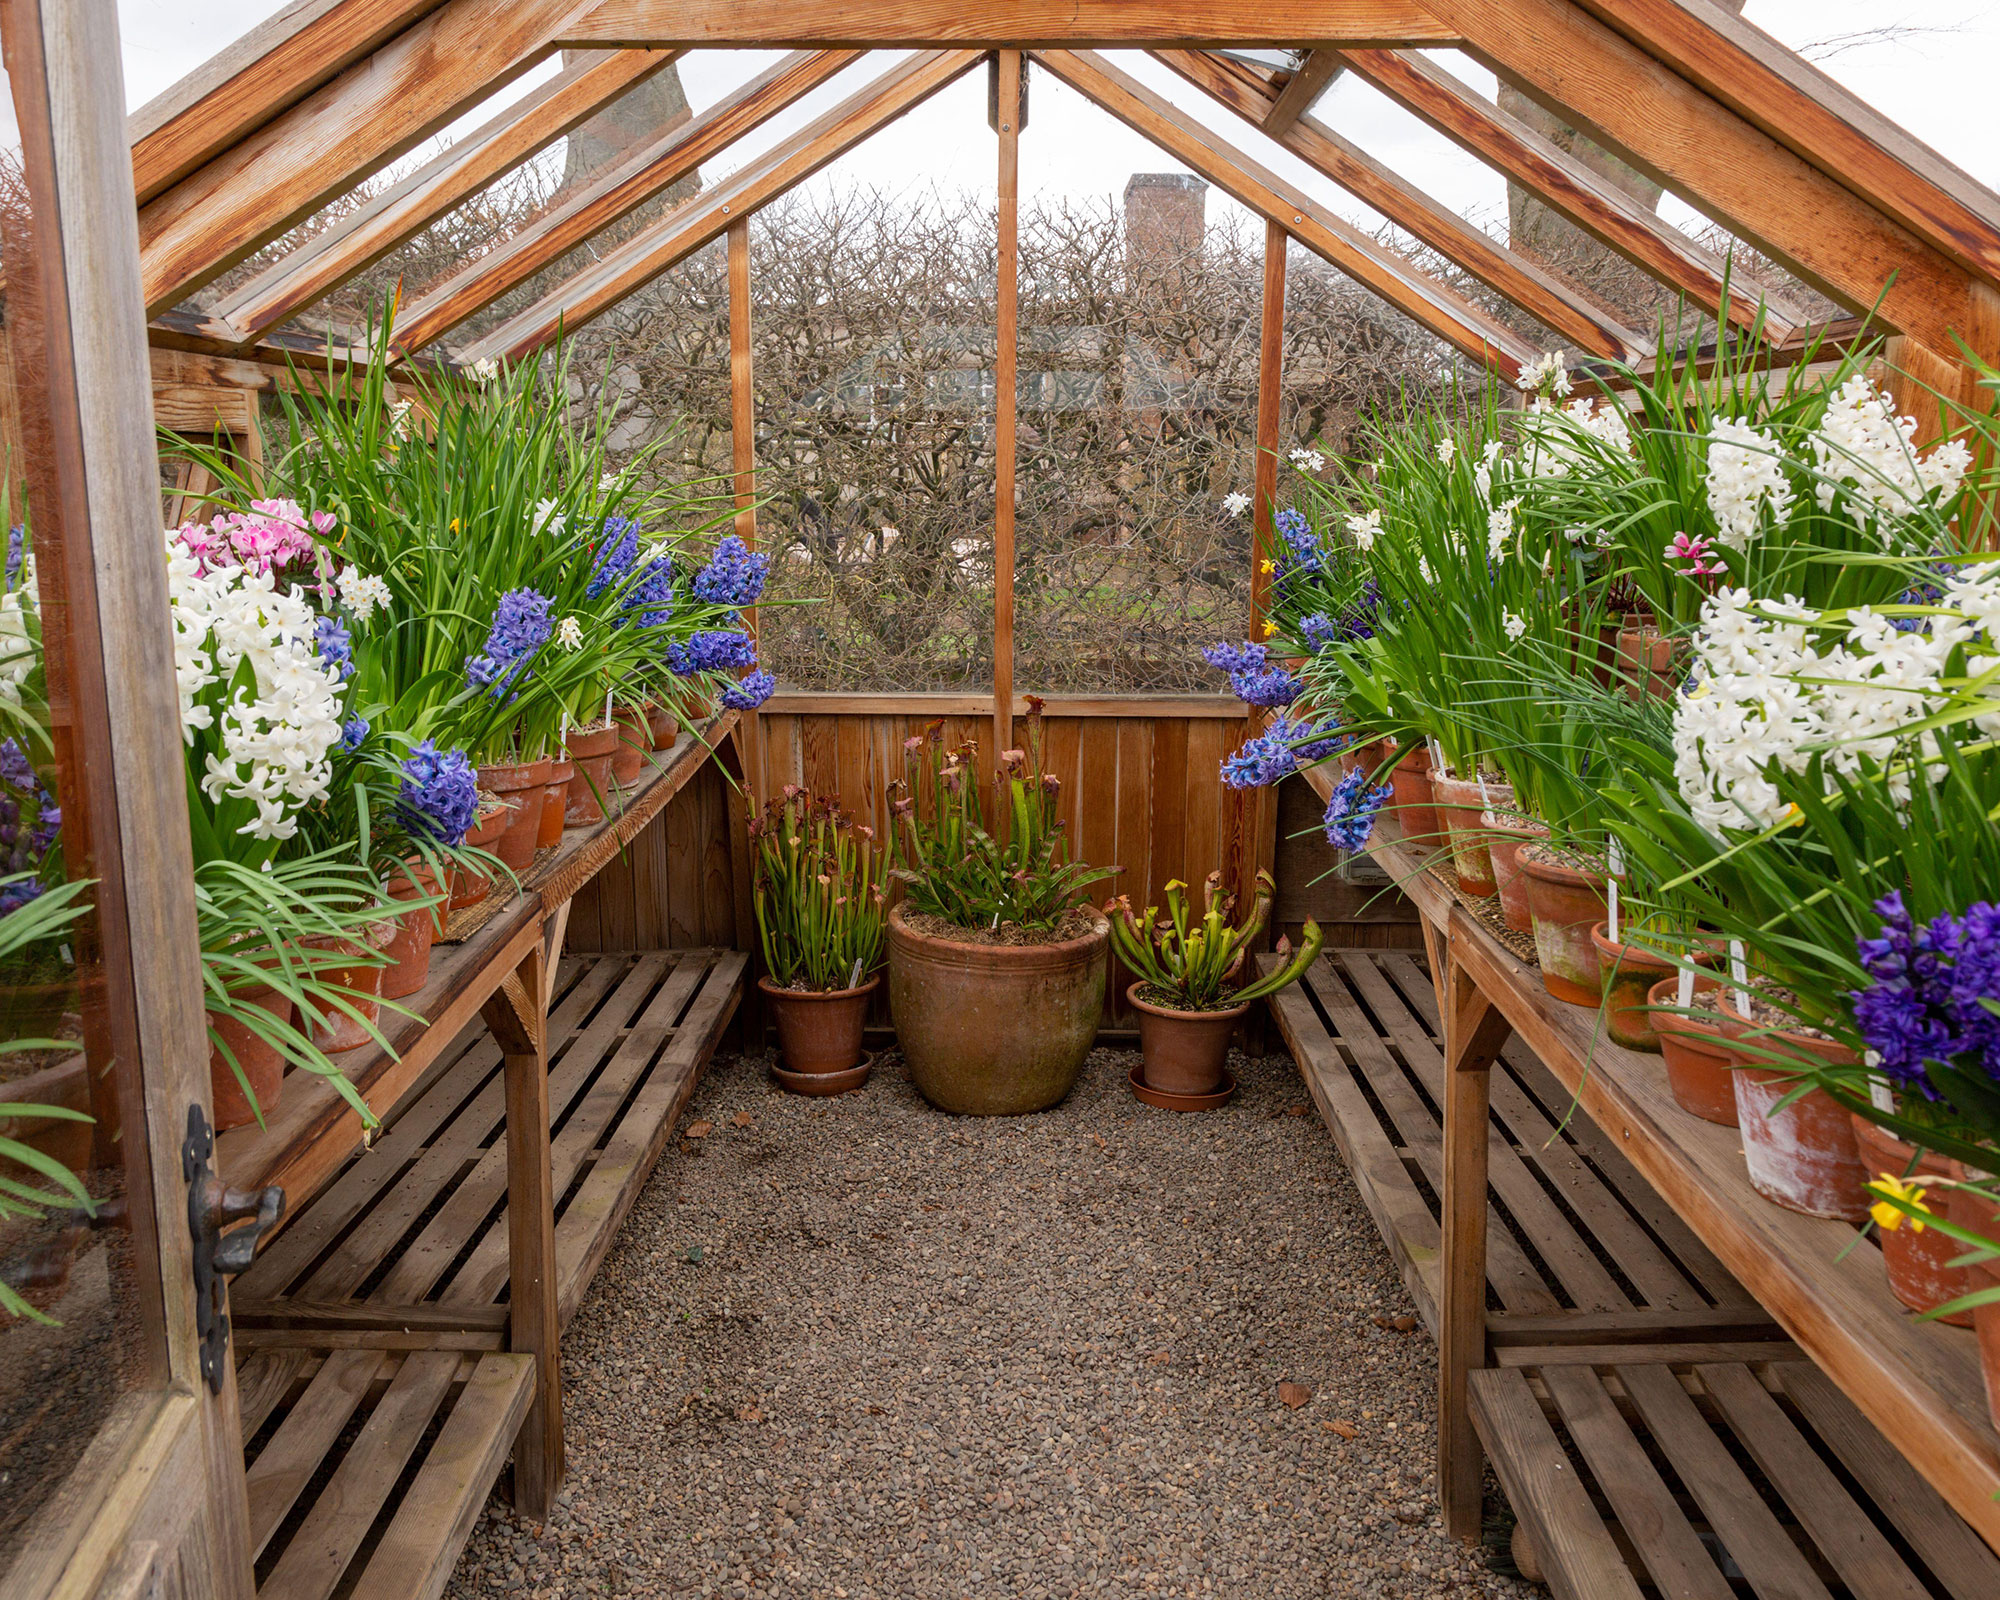
The interior should be planned around access rather than filled with shelves. A narrow central path makes watering, pruning, and inspecting plants much easier. Shelving on one or both sides can hold seedlings, herbs, and containers, while taller crops can be placed where they will not block the door or airflow.
For beginners, this type of greenhouse is useful because it creates one contained learning space. Instead of trying to control temperature across a large structure, you can quickly see how direct sunlight, open doors, shade cloth, watering, and ventilation affect a small volume of air. The downside is that small greenhouses can heat very quickly. Because there is relatively little interior air volume, temperature changes happen faster than many new gardeners expect. A mild spring morning can become extremely warm by early afternoon if the greenhouse is closed.
Choose a design with adjustable vents, a door that can be secured open, or removable side panels where appropriate. Anchoring also matters because lightweight greenhouse frames can become unstable during strong wind.
Best For
Beginners who want one compact growing zone for seedlings, herbs, greens, and a few container vegetables.
3. A Greenhouse Built Directly Over a Raised Bed
If the main goal is extending the vegetable-growing season rather than creating a separate potting space, a greenhouse built over an existing raised bed can be one of the most space-efficient options available. The basic concept is simple: a frame sits over the bed and supports clear greenhouse plastic, polycarbonate, or another appropriate covering. The structure may be low enough to act like a large cold frame or tall enough to allow tomatoes, peppers, cucumbers, or other crops to grow inside during part of the year.
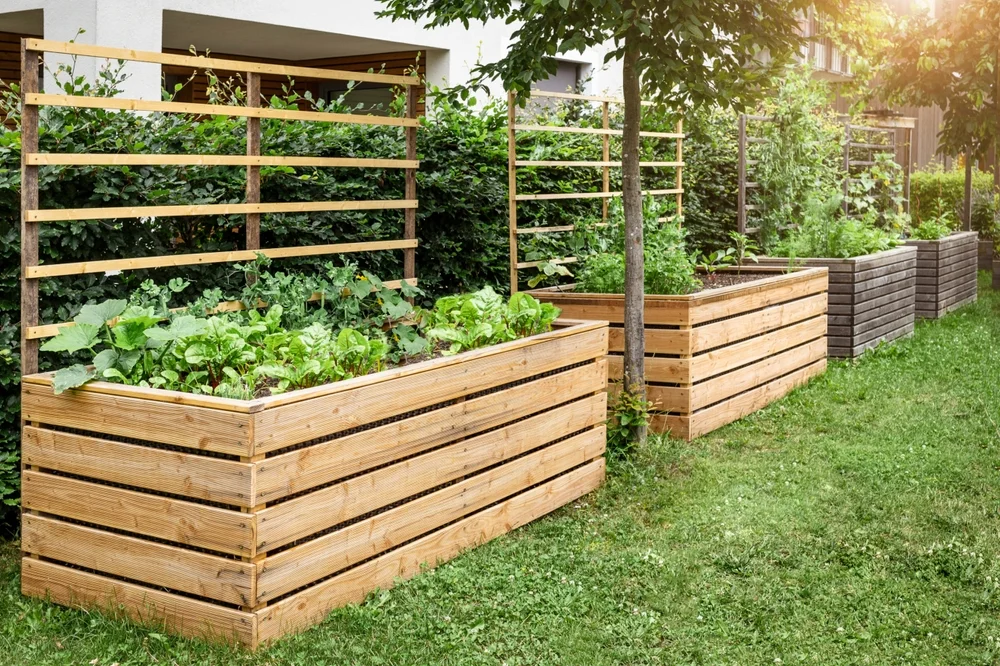
This approach makes excellent use of space because the greenhouse occupies ground that was already dedicated to food production. You do not need a separate greenhouse foundation, and irrigation lines can remain in the bed year-round. A removable or hinged design adds flexibility. During cool weather, the bed is enclosed to protect plants and increase warmth. As temperatures rise, panels can be opened or removed so the same bed behaves like a normal outdoor garden.
The biggest mistake is building the cover without a ventilation plan. Even early in the season, bright sun can raise temperatures dramatically beneath clear covering. Hinged lids, roll-up sides, removable panels, or vents make the bed far easier to manage.
Best For
Raised-bed gardeners, small yards, leafy greens, early spring crops, and anyone who wants season extension without adding another structure.
4. A Cold Frame for the Smallest Possible Greenhouse Footprint
A cold frame is essentially a miniature greenhouse positioned close to the ground. It usually consists of an insulated or solid-sided box with a transparent lid angled toward the sun. The small internal volume warms quickly during the day and can protect crops from wind, frost, and cooler temperatures.
For a beginner with almost no spare backyard space, this is one of the easiest season-extension tools to experiment with. A cold frame can hold seedling trays in spring, protect lettuce and spinach during cool weather, harden off young plants before transplanting, or shelter low-growing crops later in the year.
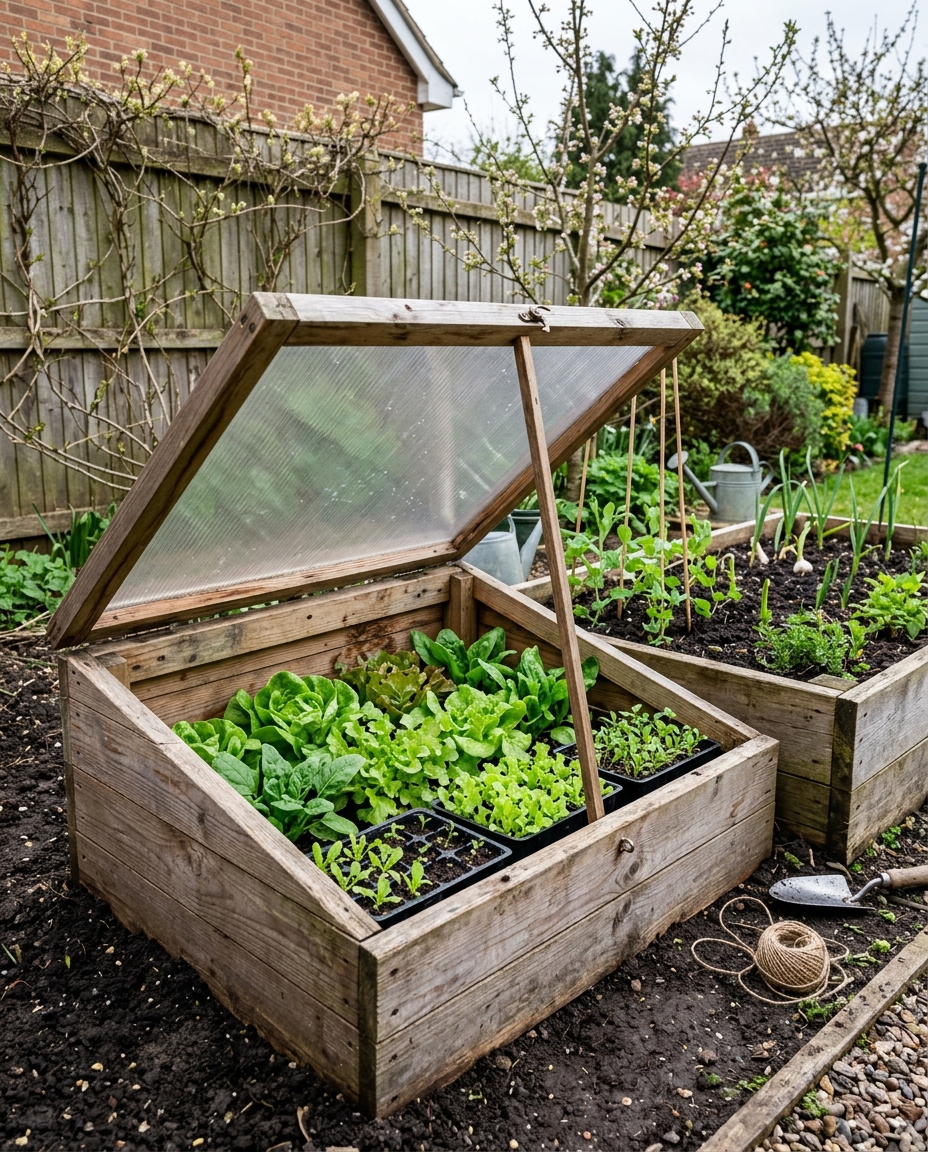
Because the structure is small, temperature management matters even more. A closed cold frame can become surprisingly hot on a sunny day, even when the outside air feels cool. The lid should therefore be easy to prop open at several heights so excess heat can escape. Cold frames also work best when placed somewhere with good winter sun and protection from harsh wind. A slight slope on the transparent lid improves solar exposure and allows rain to drain away rather than collecting on the surface.
Cold Frame vs. Small Greenhouse
| Feature | Cold Frame | Mini Greenhouse |
|---|---|---|
| Walk-in access | No | Usually yes |
| Cost | Low | Low to moderate |
| Best use | Seedlings, greens, hardening off | Seedlings, herbs, container crops |
| Space required | Very low | Low |
| Heating capacity from sun | Fast | Fast |
| Overheating risk | High if closed | High if poorly ventilated |
5. A Shelf Greenhouse for Seed Starting
If your main goal is raising seedlings rather than growing full-size vegetables, a tall narrow greenhouse with multiple shelves may be more useful than a large structure with open floor space. Shelf greenhouses use vertical space efficiently. Several trays of tomatoes, peppers, herbs, flowers, lettuce, and brassicas can fit within a footprint little larger than a small bookcase. Clear plastic or polycarbonate covering creates a warmer, protected environment, while removable shelves allow taller plants to be accommodated later.
Light distribution is the main challenge. The highest shelf may receive strong sun while lower shelves become shaded by the trays above. Rotating plants or spacing shelves appropriately can help, but seedlings should still be monitored for stretching or leaning.
Ventilation is also necessary because seedling trays create humidity. Poor airflow can contribute to fungal problems and weak growth. Leaving the front flap open during warm parts of the day or choosing a design with vents can improve circulation. A shelf greenhouse works particularly well beside a sunny wall or patio where a full walk-in structure would be excessive.
Best For
Starting seeds, propagating herbs, hardening off seedlings, and growing small pots in limited backyard or balcony space.
6. A Portable Pop-Up Greenhouse for Seasonal Use
A portable greenhouse is useful when you need protection only during part of the year or do not want a permanent structure occupying the yard year-round. These structures typically use lightweight metal frames covered with reinforced plastic. They can be assembled before the cool season, used for seedlings or tender plants, and dismantled when the weather becomes warm enough for outdoor growing.
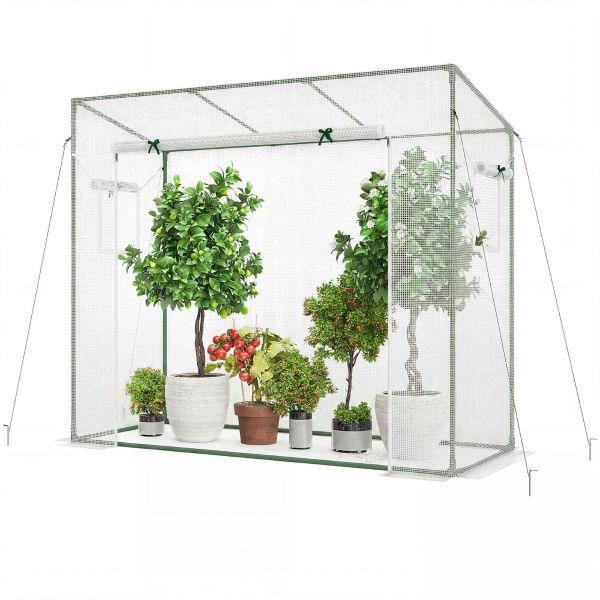
This flexibility makes them attractive for renters and beginners who are unsure how much they will actually use a greenhouse. It also allows the location to change as you learn more about the sunlight patterns in your yard.
The tradeoff is durability. Lightweight greenhouses are more vulnerable to wind, torn covers, weak zippers, and unstable framing than a permanent wooden or metal structure. They should be anchored securely according to the manufacturer’s design rather than simply placed on the lawn. Condensation is another concern. Plastic covers can collect moisture inside, particularly when nights are cool. Opening the structure during appropriate daytime conditions improves ventilation and helps avoid permanently stagnant humid air.
Best For
Renters, first-time greenhouse users, temporary winter protection, and gardeners who do not want permanent construction.
7. A Small Polycarbonate Greenhouse for Better Durability
For gardeners ready to invest in a more permanent structure, polycarbonate is often a practical alternative to traditional glass. Twin-wall or multiwall polycarbonate panels are lightweight, relatively durable, and provide some insulation compared with a single thin layer of glazing. They also diffuse sunlight, which can reduce extremely harsh direct beams inside the structure.
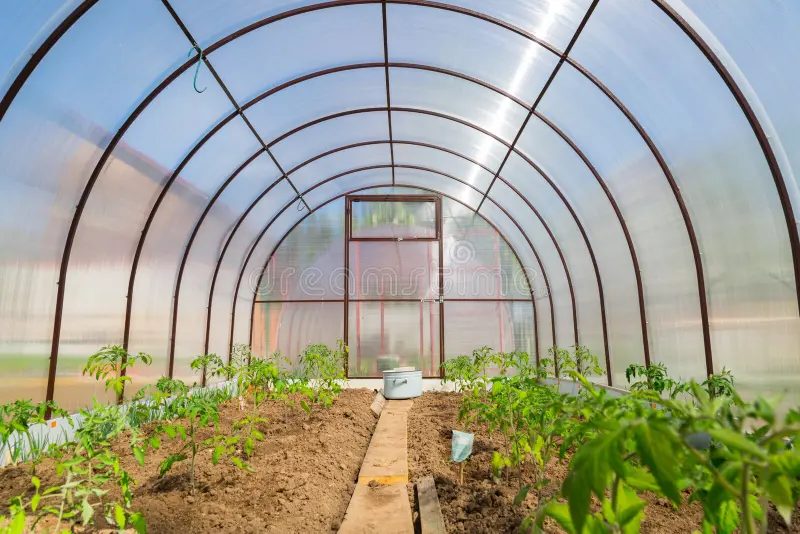
A small polycarbonate greenhouse can work well for year-round seed starting, extending the vegetable season, overwintering some suitable plants, or growing heat-loving crops during cooler periods. The structure is still not automatically frost-free in winter, however. Without supplemental heat, stored solar energy, insulation, or a suitable climate, nighttime temperatures can fall close to outdoor conditions.
The foundation should be level and secure. Even a small permanent greenhouse experiences significant wind load, so anchoring the structure properly matters more than simply assembling it on loose soil. Ventilation should include more than opening the door. Roof vents are especially useful because hot air naturally rises, allowing heat to escape from the highest point.
Common Greenhouse Glazing Options
| Material | Durability | Insulation | Cost | Main Use |
|---|---|---|---|---|
| Thin greenhouse film | Low-moderate | Low | Low | Temporary/seasonal structures |
| Single-wall polycarbonate | Moderate-high | Low-moderate | Moderate | Small permanent greenhouses |
| Twin-wall polycarbonate | High | Moderate | Moderate-high | More durable backyard setups |
| Glass | High but breakable | Variable | High | Traditional permanent greenhouses |
8. A Wall-Mounted Mini Greenhouse
Where ground space is extremely limited, a shallow wall-mounted greenhouse can provide protected growing space without consuming much of the patio or yard. These structures resemble tall glazed cabinets fixed against a sunny wall. Shelves hold trays, herbs, or compact pots, and doors or hinged panels open from the front for access.
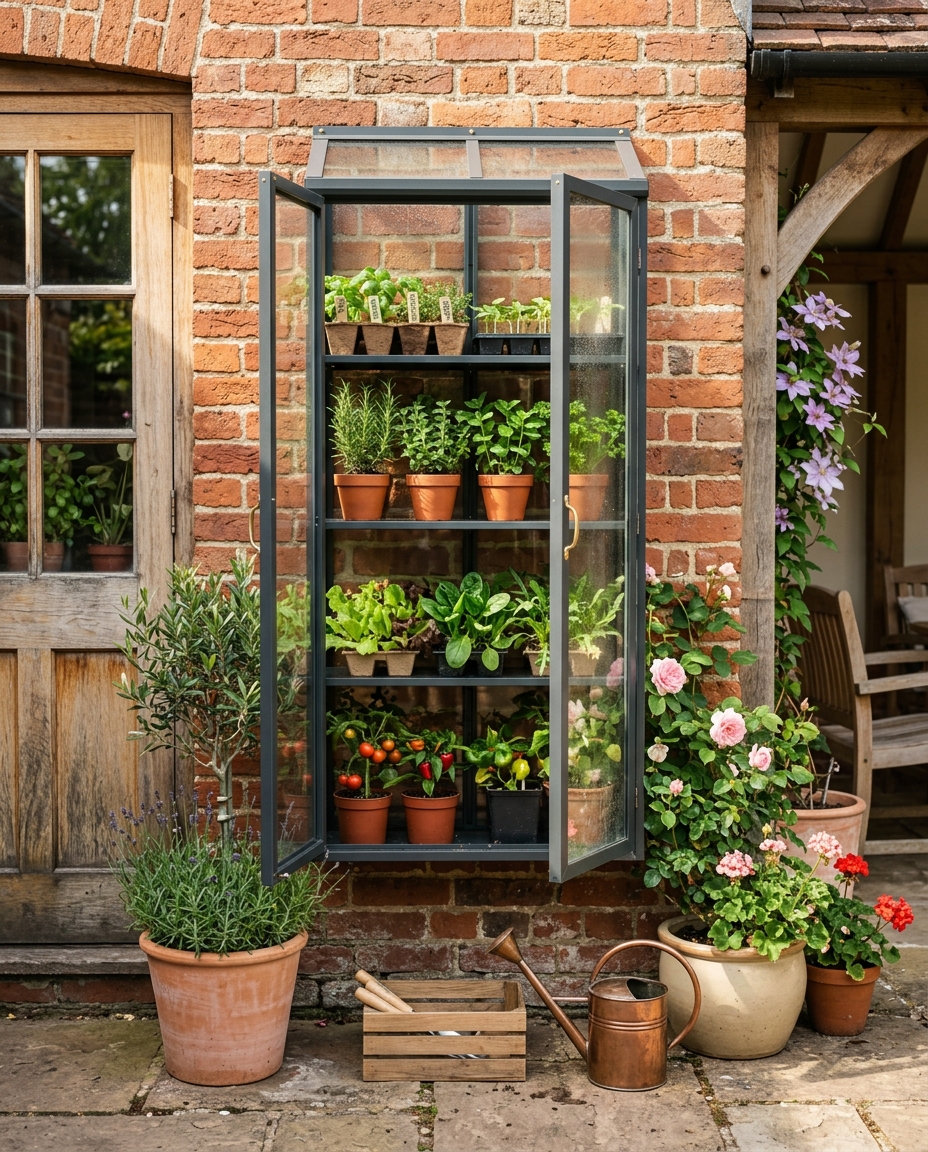
The wall location makes them particularly useful near a kitchen, where herbs can be harvested frequently. They are also convenient for seed starting because trays remain protected from heavy rain, wind, and some sudden temperature changes. Depth is limited, so this design is not suited to large mature vegetable plants. The strongest use is propagation, herbs, leafy greens, or temporary protection for young plants before transplanting.
As with any greenhouse attached to a wall, overheating needs attention. A shallow enclosed cabinet can heat rapidly when sunlight hits the glazing directly. Adjustable vents or doors that can remain partially open are important.
Best For
Tiny patios, balconies, narrow yards, herbs, seedlings, and gardeners who want almost no lost ground space.
9. A Hoop House Over a Small Garden Bed
A small hoop house uses flexible hoops covered with greenhouse plastic or row-cover material to create a tunnel over a garden bed. This is one of the least expensive ways to experiment with greenhouse-style growing because the structure requires relatively few materials. Hoops can be installed over raised beds or in-ground rows, and the covering can be added or removed according to the season.
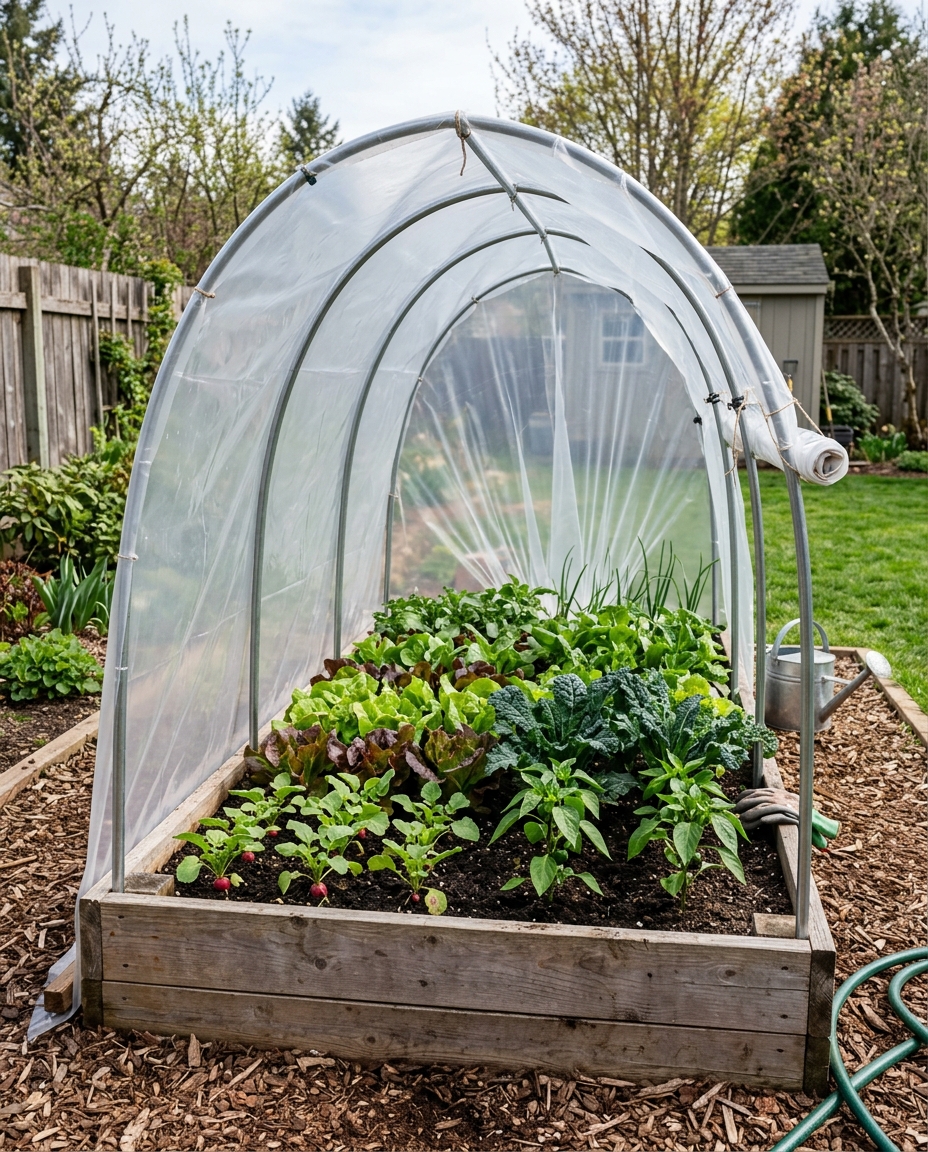
The design works particularly well for cool-season vegetables, early seedlings, and extending the harvest later into autumn. Taller hoops can also provide temporary protection for tomatoes or peppers early in the season. Ventilation should be built into the design. Sides that can roll upward or end panels that open make temperature control much easier than a tunnel that must be completely dismantled whenever the day becomes warm.
Wind is the main structural challenge. Greenhouse film behaves like a sail when not attached securely, so edges should be properly anchored and the hoops should be strong enough for expected local conditions.
Best For
Budget gardeners, raised beds, seasonal vegetable production, and anyone who wants a greenhouse effect without building a permanent greenhouse.
10. A Recycled-Window Greenhouse for a Cottage-Garden Look
Old windows can be repurposed into a small greenhouse with far more visual character than many modern kits. The appeal is obvious: reused windows can create an attractive structure that feels integrated into a cottage garden or homestead-style backyard. Each panel has slightly different proportions, creating a handcrafted look that can be difficult to replicate with uniform greenhouse materials.
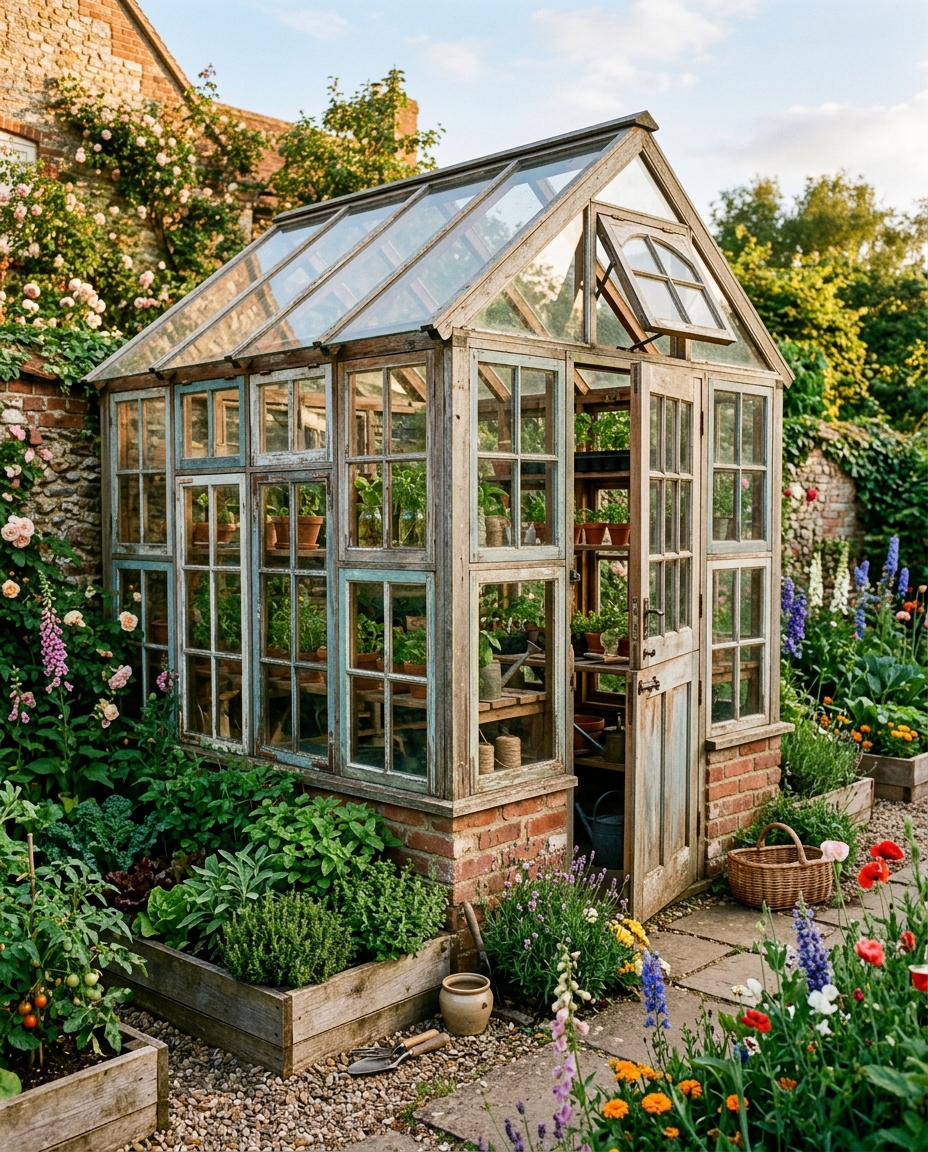
The challenge is that this is not necessarily the easiest beginner build. Window frames vary in strength, glass thickness, and condition. Old paint may require careful handling, and heavy glass increases structural demands. The framing needs to be strong enough to support the windows securely while resisting wind.
Ventilation can be incorporated by using some windows as operable panels rather than fixing every section permanently closed.
Before using salvaged materials, inspect them carefully. Rotting frames, cracked glass, unknown coatings, and structural weakness can turn a charming greenhouse project into a maintenance problem. This idea works best for gardeners who enjoy DIY construction and want the greenhouse to become part of the visual identity of the backyard.
Best For
Cottage gardens, DIY enthusiasts, homestead-style backyards, and gardeners comfortable with more involved construction.
11. A Greenhouse-Potting Shed Combination
In a very small yard, structures that perform two jobs can be more practical than separate buildings. A greenhouse-potting shed combination provides protected growing space on one side and dry storage or workspace on the other. The greenhouse section may contain clear walls and shelving, while the more enclosed portion stores pots, hand tools, seed trays, soil amendments, and other gardening supplies.
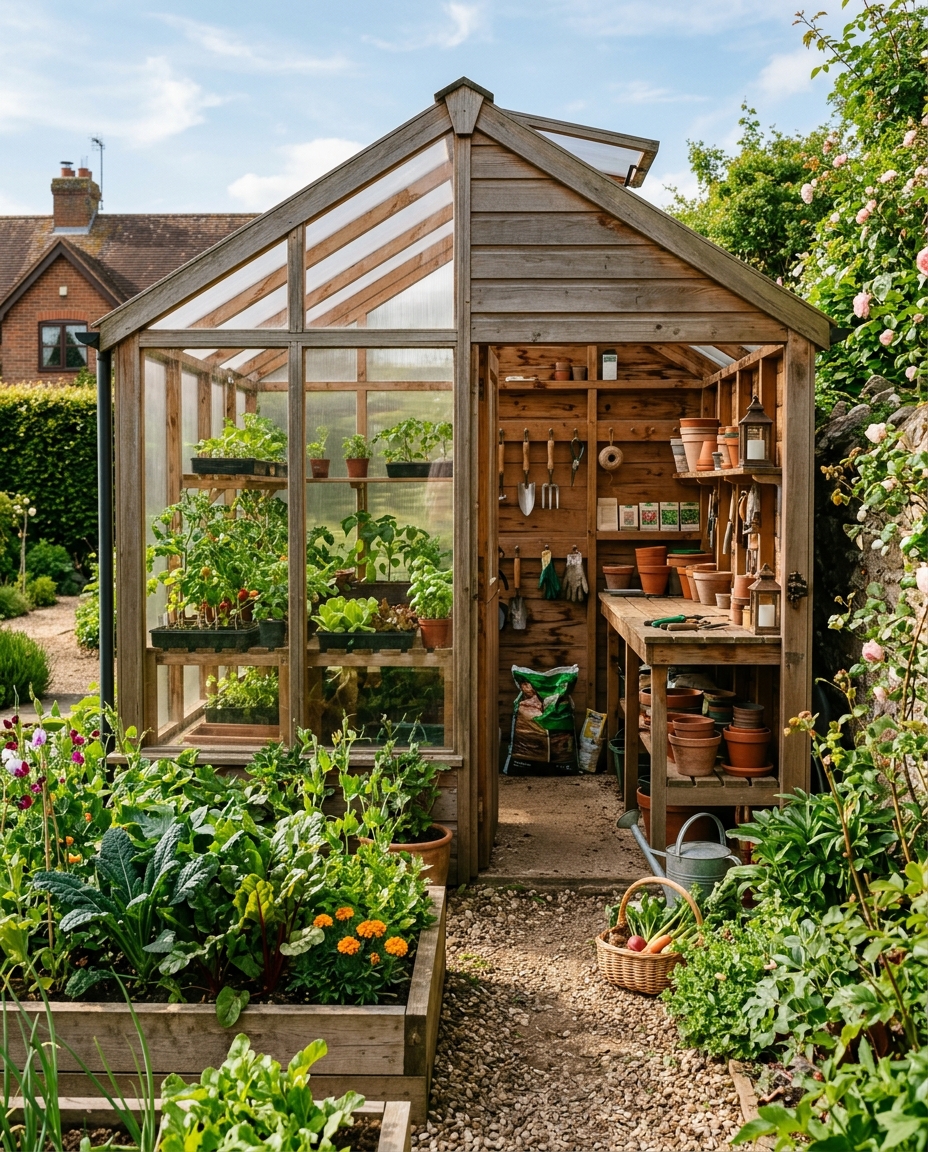
This can actually save space compared with having a greenhouse plus a separate shed. The design also improves workflow. Seeds, tools, labels, potting mix, and transplant trays remain close to the plants rather than being carried repeatedly across the yard. A narrow bench between the storage and growing sections can become a useful potting station.
For beginners, the important thing is not letting the storage side slowly consume the greenhouse. Designate clear zones from the beginning so bags, tools, and unused pots do not gradually block light or ventilation. The greenhouse portion still needs the same environmental controls as any other structure. A convenient workbench does not compensate for poor airflow or excessive summer heat.
Best For
Gardeners with limited storage, serious seed starters, and small backyards where every structure needs more than one purpose.
12. A Greenhouse With Built-In Raised Beds
A greenhouse becomes much more productive when its interior layout is designed before construction rather than filled with random pots afterward.
Built-in raised beds along the sides can create a highly efficient vegetable-growing space. The soil volume remains larger and more stable than individual containers, irrigation can be installed permanently, and taller crops such as tomatoes or cucumbers can be trained vertically toward roof supports.
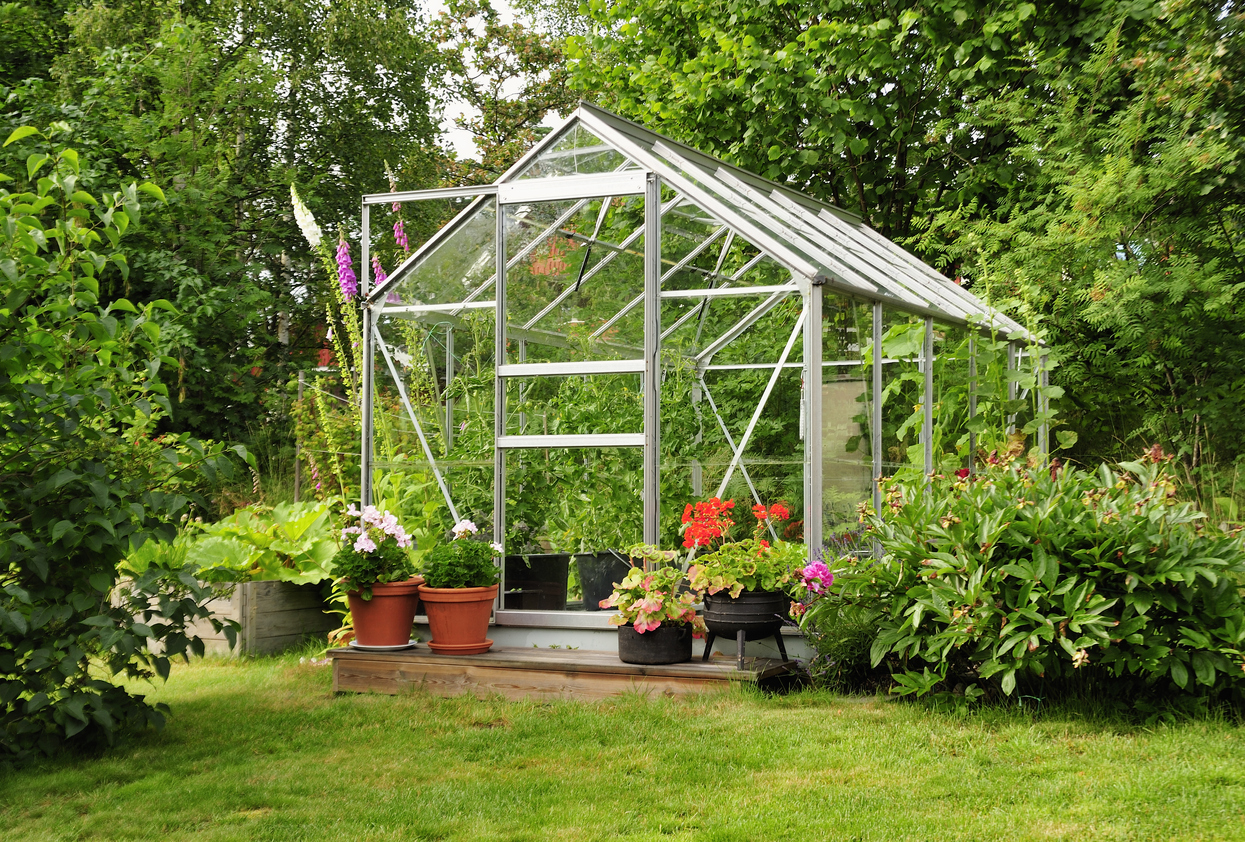
A narrow central pathway allows access to both beds while using most of the greenhouse footprint for growing rather than circulation. Bed width matters. If the greenhouse walls prevent access from the outside, each bed should remain narrow enough to reach comfortably from the central path. Making the beds too deep creates inaccessible soil along the outer wall.
Vertical supports should be planned before large crops are planted. Tomatoes can use strings attached to strong overhead framing, while cucumbers may climb mesh panels or trellises along the bed edges. Shorter crops can occupy lower zones early in the season. This setup works particularly well for gardeners who know they want to grow vegetables intensively rather than using the greenhouse mainly for seed starting.
Example Small Greenhouse Layout
| Area | Possible Use |
|---|---|
| Left raised bed | Tomatoes, peppers, basil |
| Right raised bed | Cucumbers, greens, herbs |
| Back wall | Shelving for seedlings |
| Overhead support | Tomato strings or cucumber trellis |
| Central path | Harvesting and maintenance |
| Near door | Watering supplies and frequently used tools |
How to Choose the Right Greenhouse for a Small Backyard
The best greenhouse is not determined by appearance alone. Before buying or building anything, decide what problem the structure needs to solve. If you mainly want to start seedlings, a shelf greenhouse or wall-mounted model may be enough. And If you want to grow vegetables directly in protected soil, a greenhouse over raised beds or a small polycarbonate structure makes more sense. However, if your primary goal is extending the lettuce and spinach season, a cold frame or hoop tunnel may provide nearly all the benefits you need at a fraction of the cost and space.
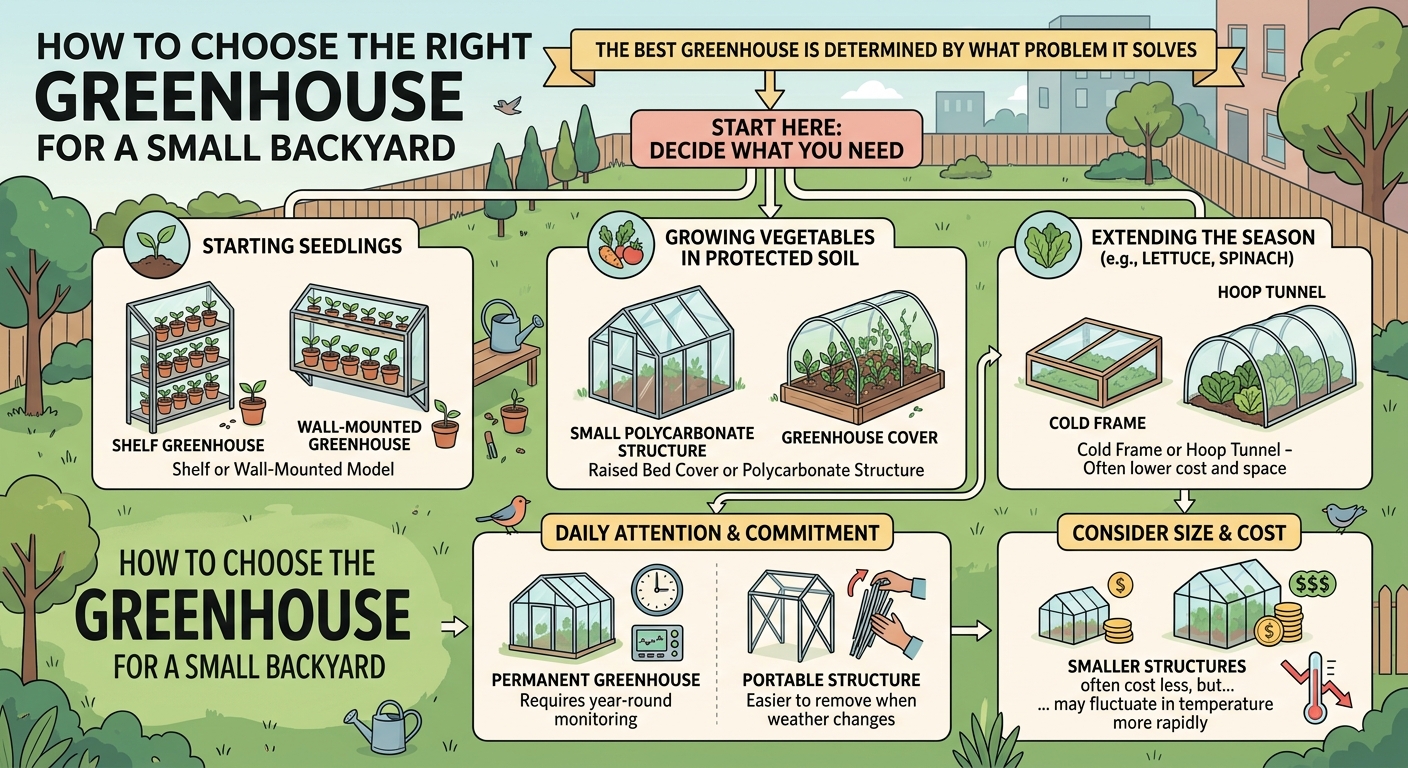
The amount of daily attention should influence the choice as well. A permanent greenhouse requires monitoring through multiple seasons. Portable structures are easier to remove when weather becomes unsuitable. Smaller structures often cost less but may fluctuate in temperature more rapidly.
Greenhouse Type Comparison
| Greenhouse Type | Space Needed | Beginner Difficulty | Cost | Best Use |
|---|---|---|---|---|
| Lean-to | Low | Moderate | Moderate-high | Long-term growing |
| Mini walk-in | Low | Easy | Low-moderate | General beginner use |
| Raised-bed cover | Very low | Easy | Low | Season extension |
| Cold frame | Very low | Easy | Low | Greens and seedlings |
| Shelf greenhouse | Very low | Easy | Low | Seed starting |
| Portable greenhouse | Low | Easy | Low-moderate | Temporary use |
| Polycarbonate greenhouse | Moderate | Moderate | Moderate-high | Long-term growing |
| Wall-mounted | Very low | Easy | Moderate | Herbs and seedlings |
| Hoop house | Low | Easy | Low | Seasonal vegetables |
| Recycled-window | Moderate | Advanced | Variable | DIY/cottage garden |
| Greenhouse-shed combo | Moderate | Moderate-high | High | Growing + storage |
| Built-in raised-bed greenhouse | Moderate | Moderate | Moderate-high | Intensive vegetable production |
Where Should a Small Greenhouse Go?
Location is one of the most important decisions because a greenhouse cannot create sunlight that the yard does not receive. Watch the proposed area through the day. Pay attention to buildings, fences, mature trees, and neighboring structures that may cast shade, especially during winter when the sun sits lower in the sky.
Morning sunlight is particularly useful because it begins warming the greenhouse after a cold night. Strong afternoon exposure can also be valuable during cool seasons but may create severe overheating during summer.
Access matters nearly as much as sunlight. A greenhouse that requires walking through mud or carrying water across the entire property will become less convenient over time. Position it near a practical path and, when possible, close enough to a water source that irrigation is easy.
Drainage should also be evaluated before construction. Avoid low areas where rainwater collects beneath the greenhouse. Persistent wet conditions can make pathways muddy and raise humidity unnecessarily. Wind exposure matters too. A structure tucked into a protected but still sunny portion of the property usually experiences less stress than one placed in the most exposed corner of the yard.
How Hot Can a Small Greenhouse Get?
Much hotter than beginners often expect. Clear greenhouse material allows solar radiation to enter and warms interior surfaces, while the enclosed structure slows the escape of that heat. Even when outdoor temperatures are mild, the inside of a closed greenhouse can become uncomfortable or damaging to plants.
Small greenhouses often warm faster than large ones because they contain less air volume. That makes ventilation one of the most important design features. Roof vents are especially valuable because hot air naturally rises. Side vents and open doors allow replacement air to enter, creating circulation through the structure. Some greenhouse owners use automatic vent openers that expand as temperatures increase, allowing a roof vent to open without electricity.
Shade cloth may also be necessary during the hottest months, particularly in sunny climates. A thermometer inside the greenhouse is one of the simplest tools a beginner can buy. Guessing based on outdoor temperature is unreliable because the interior may be dramatically warmer.
Greenhouse Temperature Management at a Glance
| Condition | Common Response |
|---|---|
| Sunny cool day | Monitor temperature; vent if needed |
| Warm sunny day | Open vents and doors |
| Very hot weather | Maximum ventilation + shade cloth where appropriate |
| Cold clear night | Close vents; consider thermal protection |
| Frost forecast | Add suitable insulation/protection if crops require it |
| Humid still weather | Increase airflow |
The exact temperature requirements depend on the crops being grown.
What Can Beginners Grow in a Small Greenhouse?
The easiest crops are often those whose growing requirements match the greenhouse season. During cool periods, lettuce, spinach, arugula, radishes, scallions, kale, parsley, and other cool-season crops can perform well in protected conditions. The greenhouse may allow them to grow earlier in spring or later into autumn than they would outdoors.
Tomatoes, peppers, cucumbers, basil, and other heat-loving vegetables can benefit from the warmer environment during spring and early summer, but temperature management becomes more challenging once outdoor weather is already hot. Seed starting is another valuable use. Tomatoes, peppers, herbs, flowers, and many vegetables can be started in trays under suitable light and protection before being moved outdoors when conditions improve.
The mistake is trying to grow everything simultaneously. A tiny greenhouse filled with tomatoes, cucumbers, peppers, seed trays, herbs, and flowers can quickly become crowded enough that airflow and access suffer. Treat the greenhouse as a seasonal system rather than permanent storage for every plant you own.
How Much Ventilation Does a Small Greenhouse Need?
More than most first-time owners expect. Plants release water vapor, wet soil adds humidity, and solar heating raises temperature rapidly. Without air exchange, the greenhouse can become hot, humid, and stagnant.
Ventilation should ideally happen at more than one level. Openings near the roof allow hot air to escape, while lower openings or doors allow cooler outside air to enter. This creates natural airflow through the structure. Small fans can help circulate air inside larger or tightly enclosed greenhouses, but a fan does not replace actual ventilation if hot air has nowhere to leave.
Leaves should move gently, not sit permanently in still humid air. Condensation covering every panel each morning is a sign that humidity is accumulating overnight. Some condensation is normal, especially when temperatures change sharply, but persistent excessive moisture should prompt a review of watering, plant density, and ventilation.
Greenhouse Watering Is Different From Outdoor Watering
Plants inside a greenhouse receive no natural rainfall unless you deliberately allow it. That makes the gardener fully responsible for water supply. At the same time, enclosed conditions may reduce wind and evaporation compared with exposed beds, meaning plants do not always need water as often as expected. Overwatering because the greenhouse feels hot can create permanently saturated soil and root problems.
Check soil moisture directly. Containers dry more quickly than large raised beds because they hold less soil. Small seedling cells can dry extremely fast. Large greenhouse beds may remain moist for considerably longer.
Drip irrigation can be useful for permanent greenhouse beds because it applies water close to the root zone without wetting large amounts of foliage. Morning watering is often convenient because plants have access to moisture before daytime heat and the interior has time to dry somewhat before cooler nighttime conditions.
Do You Need to Heat a Backyard Greenhouse?
Not necessarily. An unheated greenhouse can still provide valuable season extension by protecting plants from wind, capturing daytime warmth, and creating a more moderate environment than exposed garden beds. However, an unheated greenhouse should not be treated as though it remains warm all night.
When the sun disappears, the structure begins losing heat. On a cold clear night, indoor temperatures may eventually approach outdoor temperatures, especially in a thinly glazed structure without insulation or thermal mass.
If you want to keep frost-sensitive tropical plants or warm-season vegetables alive through genuinely cold winter conditions, supplemental heating may be necessary. That changes the cost and complexity significantly. For beginners, it is often more practical to use the greenhouse for season extension rather than trying to maintain summer conditions throughout winter.
How to Make a Small Greenhouse More Space-Efficient
The easiest improvement is using height. Shelves can hold seedling trays and small pots. Hanging baskets can use overhead space where appropriate. Tomatoes can be trained upward on strings. Cucumbers can climb mesh rather than spreading across the floor.
Keep the center path clear. Every shelf or container should remain reachable without moving several others first. Crowding may increase the number of plants technically inside the greenhouse while decreasing how easy they are to water, inspect, prune, and harvest.
Use removable shelves when possible. A shelf that holds seedlings in spring can be removed later to create room for a tall pepper or tomato plant. Wall-mounted hooks and narrow tool racks can keep equipment off growing surfaces. The objective is not maximizing the number of objects inside. It is maximizing productive, accessible plant space.
Common Beginner Greenhouse Mistakes
Building Too Large Too Soon
A greenhouse creates more gardening capacity, but it also creates more watering, temperature monitoring, cleaning, planting, and maintenance. A small structure teaches the same basic skills with much less expense.
Forgetting Ventilation
Overheating is one of the fastest ways to damage seedlings and young plants.
Putting It in Shade
A beautiful greenhouse in a heavily shaded corner cannot compensate for poor light.
Overcrowding Plants
Dense foliage reduces airflow and makes pest or disease problems harder to notice.
Treating the Greenhouse Like a Storage Shed
Empty pots, bags of soil, tools, and garden supplies can slowly consume the space that was meant for plants.
Assuming It Will Stay Warm All Night
Solar heat accumulated during the day can disappear quickly after sunset.
Overwatering
A hot greenhouse does not automatically mean the root zone is dry.
Forgetting Wind Anchoring
Lightweight frames and plastic coverings can fail during storms if they are not secured properly.
A Simple Greenhouse Setup for a First-Time Gardener
For a beginner with a small backyard, a complicated greenhouse is rarely necessary. Imagine a compact six-by-eight-foot or similarly modest structure positioned in the sunniest practical section of the yard. One narrow bed runs along each side, while a central path remains wide enough for comfortable access.
The back wall contains one removable shelf for seedlings. One bed holds tomatoes and basil during the warm season. The opposite bed supports cucumbers on a trellis with lettuce or herbs planted earlier in the year. A roof vent allows hot air to escape. The door can remain safely open during warm days.
A thermometer hangs at plant height. Drip irrigation serves the permanent beds. During winter or early spring, the tomatoes and cucumbers are gone, and the beds hold spinach, lettuce, parsley, radishes, and other cool-season vegetables suited to local conditions.
That is enough. A greenhouse does not need to contain dozens of crop types to be useful. A well-managed small structure can provide seedlings, early vegetables, late-season greens, and protected growing space without overwhelming a new gardener.
12 Greenhouse Ideas at a Glance
| Greenhouse Idea | Best Use | Space Requirement | Beginner Friendly |
|---|---|---|---|
| Lean-to greenhouse | Long-term growing | Low | Yes, with planning |
| Mini walk-in | General growing | Low | Very |
| Raised-bed greenhouse | Season extension | Very low | Very |
| Cold frame | Greens and seedlings | Very low | Very |
| Shelf greenhouse | Seed starting | Very low | Very |
| Portable greenhouse | Temporary protection | Low | Very |
| Polycarbonate greenhouse | Permanent growing | Moderate | Yes |
| Wall-mounted greenhouse | Herbs and seedlings | Very low | Very |
| Hoop house | Seasonal crops | Low | Very |
| Recycled-window greenhouse | DIY garden feature | Moderate | Less |
| Greenhouse-potting shed | Growing + storage | Moderate | Moderate |
| Built-in raised-bed greenhouse | Intensive vegetable production | Moderate | Moderate |
Final Thoughts
A greenhouse can make a small backyard more productive without requiring a large property or an expensive permanent structure. The important part is understanding what you want it to do. If you mainly want healthier seedlings, start with a shelf greenhouse. However, if you want salad greens earlier in spring and later in autumn, a cold frame or raised-bed cover may be enough.
If you want a dedicated place for tomatoes, peppers, herbs, and propagation, a compact walk-in or polycarbonate greenhouse may be worth the additional space. And if your yard barely has room for another structure, a lean-to or wall-mounted design can use space that would otherwise contribute very little to the garden.
Whatever you choose, prioritize the basics before worrying about appearance. Put the greenhouse where it receives useful sunlight. Anchor it securely. Give hot air somewhere to escape. Keep a thermometer inside. Water according to the soil rather than the calendar. Leave enough room to move between plants. And remember that the greenhouse does not eliminate the seasons. It simply gives you more control over how you work with them.
For a beginner, that is already a powerful advantage. The best first greenhouse is not the biggest or most impressive one. It is the one you can understand, maintain, and use consistently enough that it actually helps you grow more.