Most “DIY homesteading” lists online recycle the same five vague ideas — build a coop, start composting, grow a garden — without ever getting into the actual dimensions, materials, or steps that make a project buildable on a weekend rather than a source of frustration. This list skips the vague version. Every project below includes real specifications: what to buy, how much it costs, and the exact steps to build it, so you can start this weekend instead of researching for another month.
1. Rodent-Proof Feed Storage Bin
Loose feed bags are one of the biggest rodent attractants on any homestead, and a simple galvanized steel trash can with a locking lid solves this permanently.
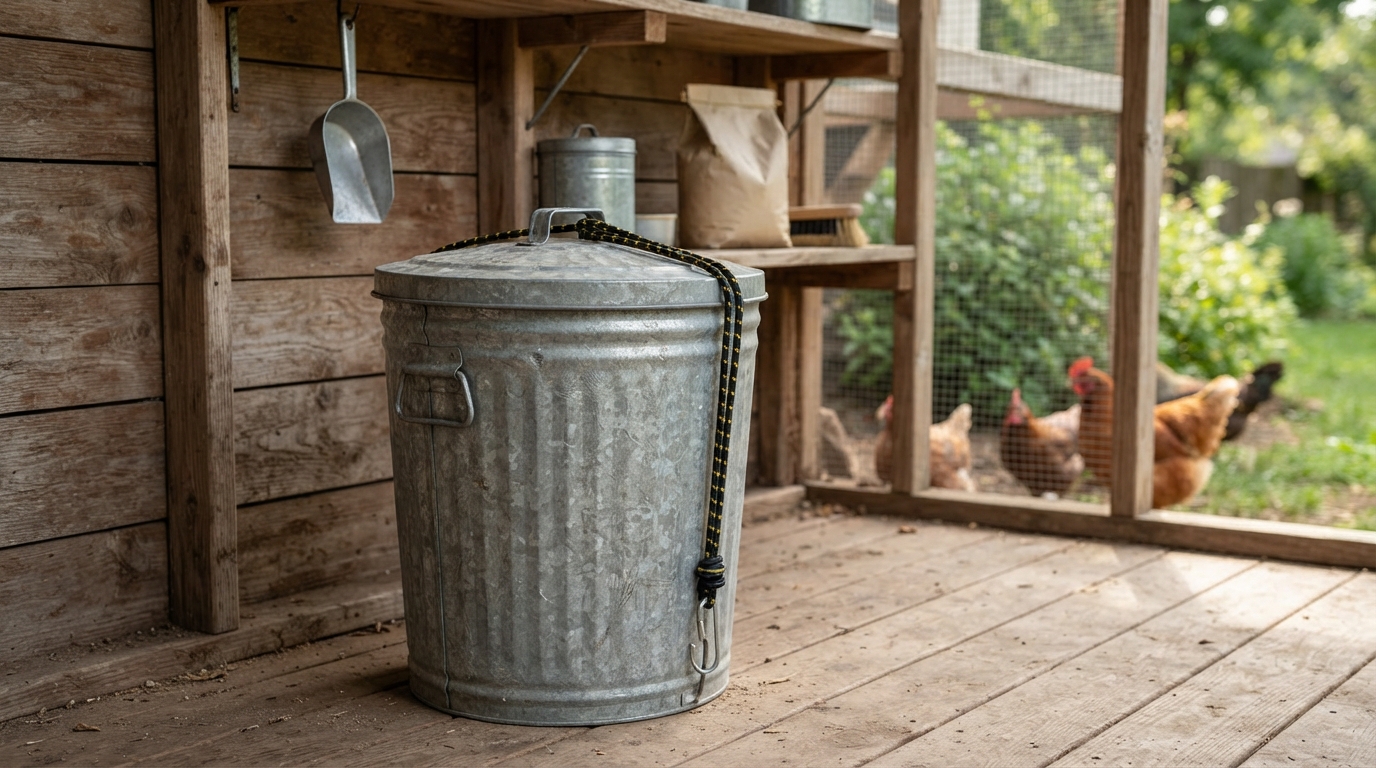
Materials: One 30-gallon galvanized steel trash can with lid ($35–$50), a bungee cord or locking lid clamp ($8), a permanent marker for labeling.
Steps: 1) Wash and fully dry the can. 2) Cut feed bags open and pour directly into the can, up to 3–4 inches from the top to allow room for a scoop. 3) Secure the lid with a bungee cord looped through the side handles, or a purpose-made locking clamp for extra security against raccoons. 4) Store the scoop inside, resting on top of the feed.
Cost: $45–$60 total. Pro tip: Metal, not plastic — rodents and even determined chickens can chew through plastic bins within weeks.
2. Gravity-Fed PVC Chicken Waterer
A gravity-fed waterer built from PVC pipe keeps water cleaner than an open dish and needs refilling far less often.
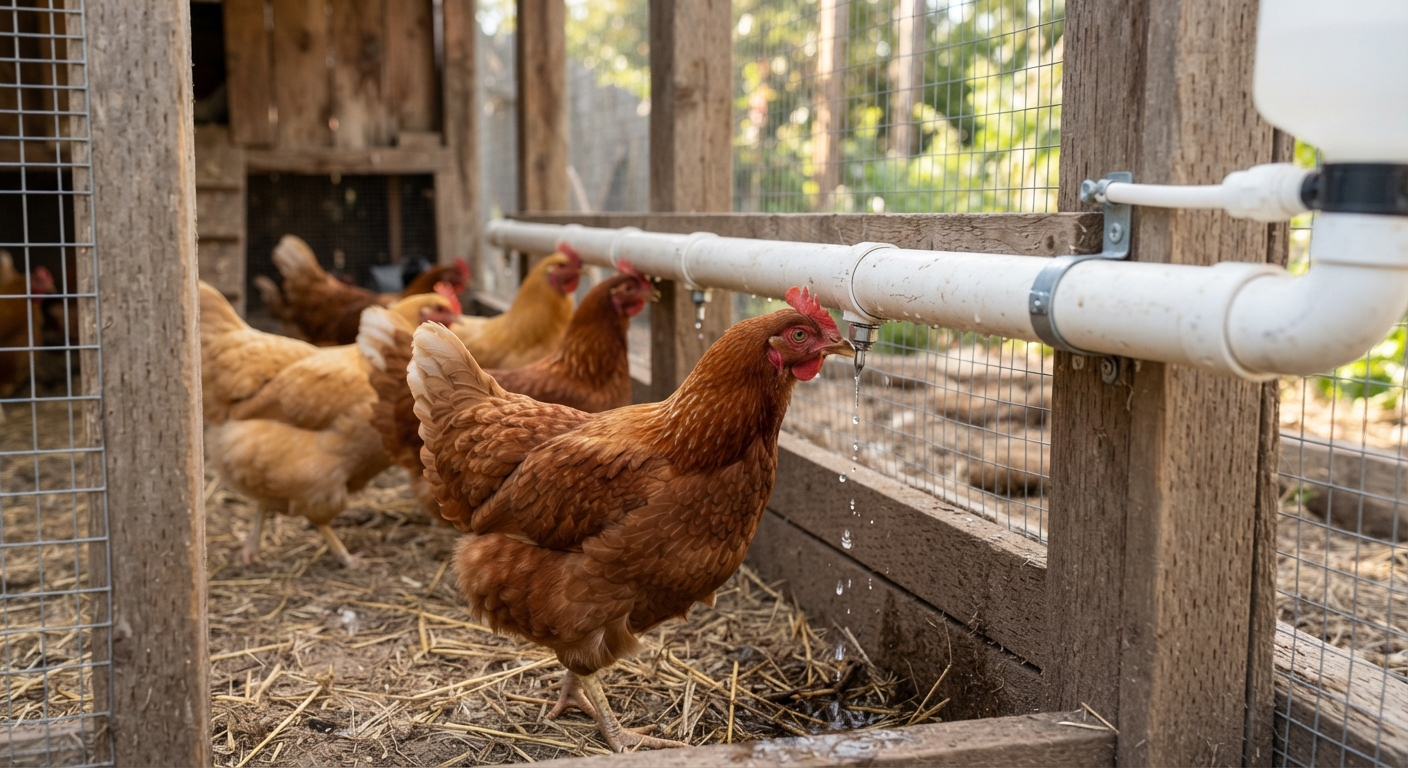
Materials: One 4-inch diameter PVC pipe, 3 feet long ($12), one PVC end cap ($3), one PVC 90-degree elbow ($3), 2–3 chicken nipple waterers ($1.50 each), PVC cement ($6), a drill with a bit sized to the nipples.
Steps: 1) Cap one end of the pipe with PVC cement. 2) Attach the elbow to the other end, angled downward slightly. 3) Drill holes along the bottom of the horizontal pipe section, spaced 8–10 inches apart, sized for the nipple threads. 4) Screw in the nipple waterers. 5) Mount the assembly at chicken-shoulder height (roughly 8–10 inches off the ground for standard breeds) and fill through a removable cap at the top.
Cost: $25–$35. Pro tip: Chickens take a few days to learn how nipple waterers work — leave the old waterer available for the first week during the transition.
3. Pallet-Based Three-Bin Compost System
A three-bin system lets you have compost at three different stages (fresh, turning, finished) going simultaneously, which single-bin setups can’t do.
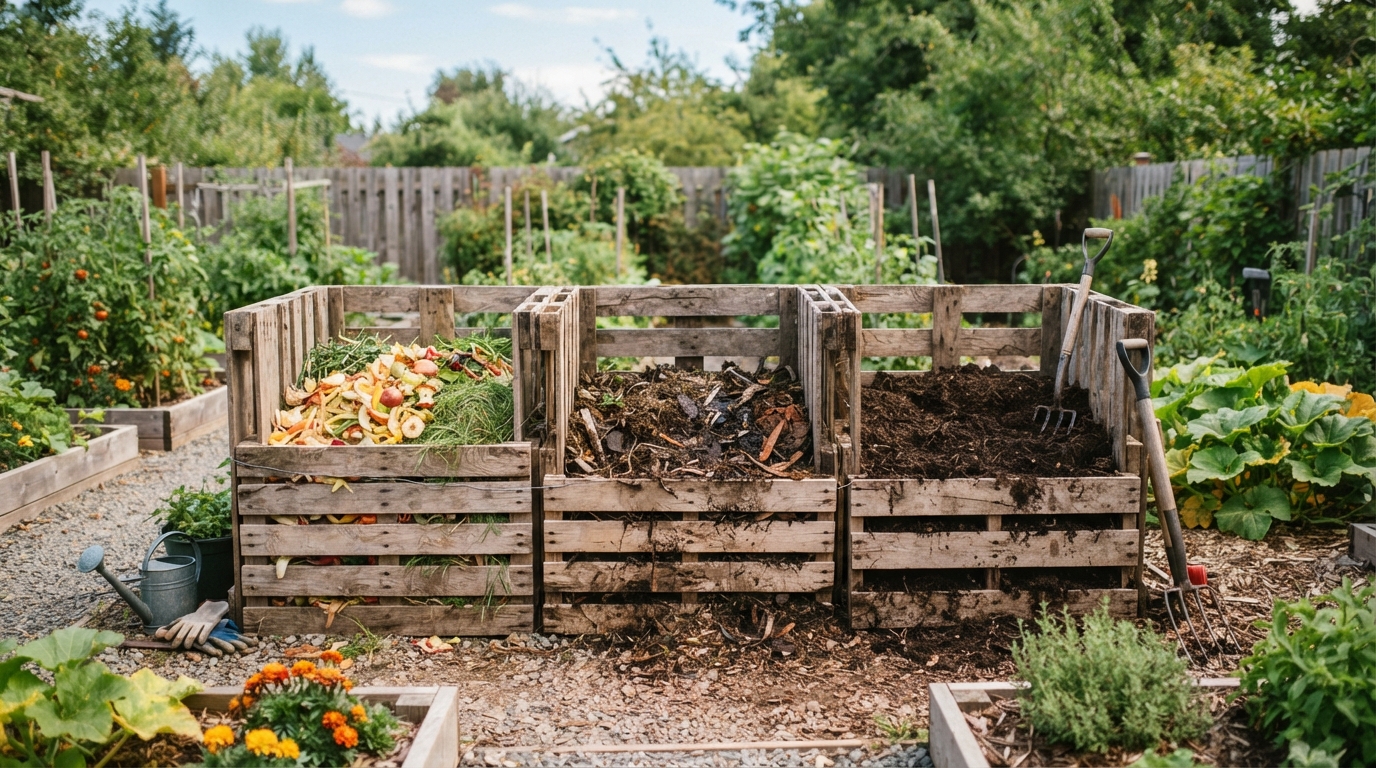
Materials: 12 wooden pallets (often free from hardware or garden stores — ask before taking), 20 galvanized deck screws ($8), a drill/driver.
Steps: 1) Stand four pallets upright to form the back and two side walls of the first bin, screwing corners together. 2) Repeat twice more, sharing walls between adjacent bins so you use 3 pallets per shared wall instead of 4 per bin. 3) Leave the fronts open, or attach a fourth pallet on hinges per bin for a closeable front. 4) Total footprint: roughly 12 feet long by 4 feet deep for all three bins combined.
Cost: $0–$40 depending on whether pallets are free. Pro tip: Turn compost from bin one into bin two every 2–3 weeks; finished compost ends up in bin three, ready to use.
4. Cedar Raised Garden Bed (4×8 Feet)
Cedar resists rot naturally without chemical treatment, making it the standard choice for raised beds that will hold food crops.
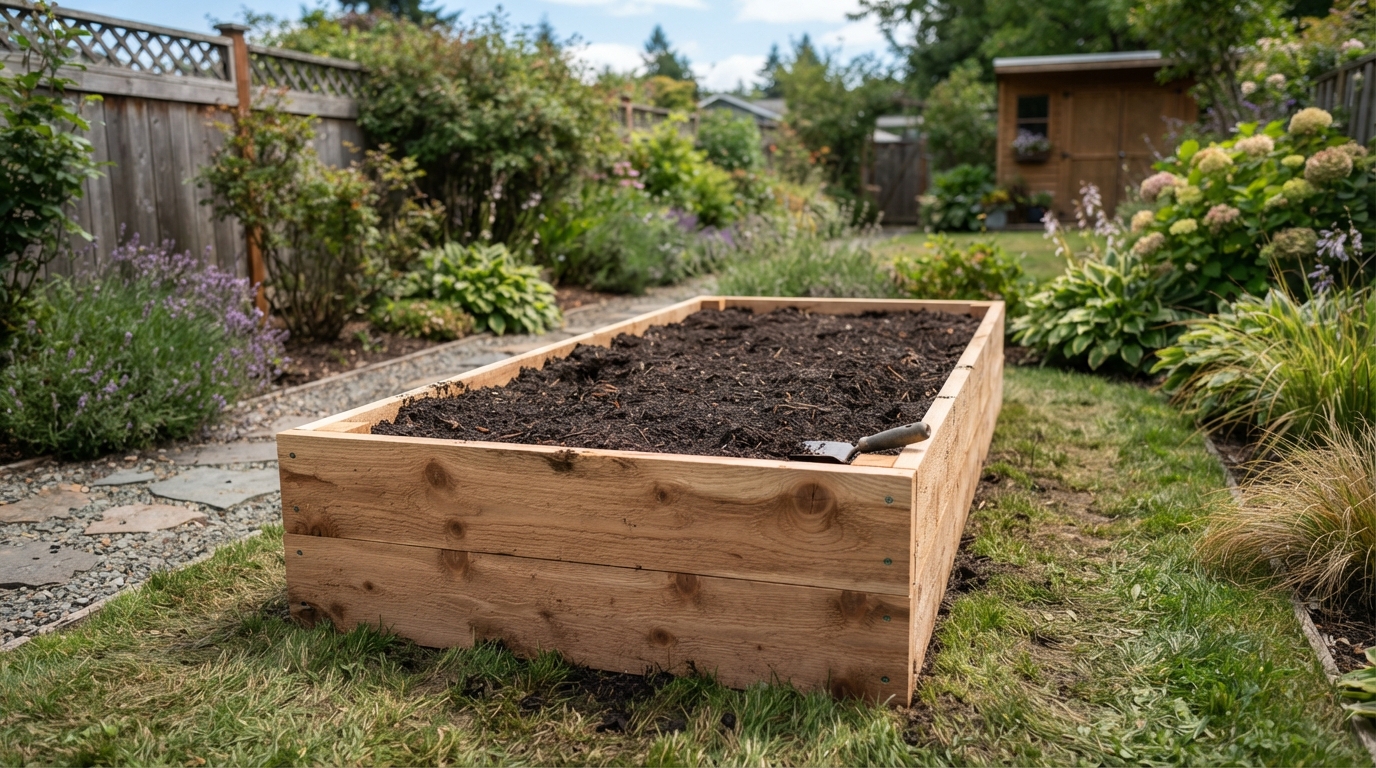
Materials: Six cedar boards, 2×8 inches by 8 feet long ($18 each), sixteen 3-inch exterior wood screws ($6), four 4×4 cedar corner posts, 12 inches long, for ground stability ($20).
Steps: 1) Cut two boards to 8 feet (long sides) and four boards to 4 feet (short sides — two boards stacked per end for a 16-inch-tall bed). 2) Screw the 4×4 posts into each corner, flush with the top, extending a few inches below for ground anchoring. 3) Screw the long and short boards into the corner posts to form the rectangle. 4) Level the ground, position the frame, and fill with a mix of topsoil, compost, and aged manure (roughly 60/30/10).
Cost: $130–$160. Pro tip: Line the bottom with hardware cloth before filling if rodents or burrowing pests are a concern in your area.
5. 55-Gallon Rain Barrel Collection System
Diverting gutter runoff into a storage barrel can capture several hundred gallons per season from an average roof, cutting hose water use for garden irrigation.
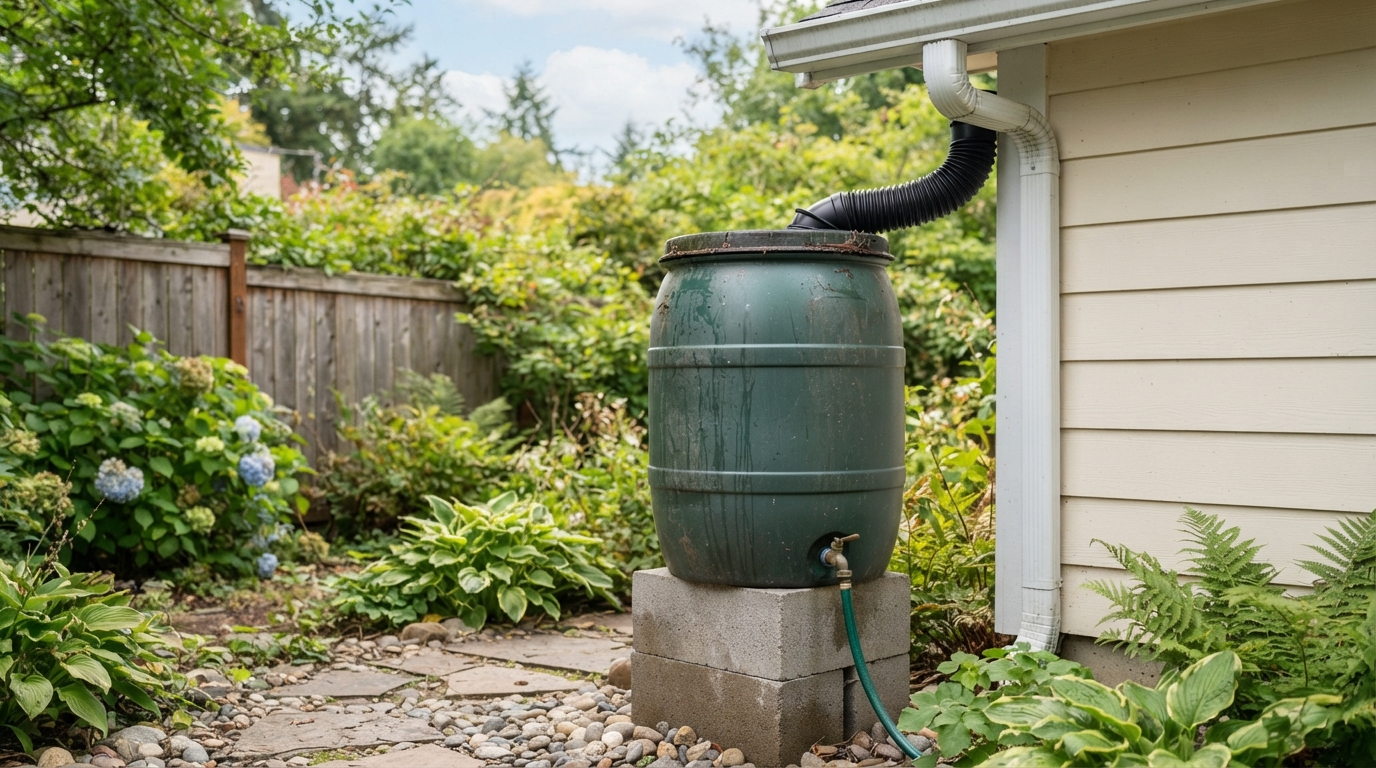
Materials: One food-grade 55-gallon plastic barrel ($40–$60, often available used from food distributors), a brass spigot kit ($10), a downspout diverter kit ($25), a drill with hole saw attachment, Teflon tape.
Steps: 1) Drill a hole near the bottom of the barrel sized for the spigot threading; wrap threads with Teflon tape and install. 2) Cut a matching overflow hole a few inches from the top. 3) Install the downspout diverter into the existing gutter downspout, following the kit’s cut instructions. 4) Position the barrel on a stable, elevated base (concrete blocks work well) directly under the diverter outlet, and connect a short hose from the diverter into the barrel’s top opening.
Cost: $75–$100. Pro tip: Elevating the barrel 12–18 inches on blocks gives enough gravity pressure to fill a watering can from the spigot without a pump.
6. Hardware-Cloth Predator-Proofed Chicken Run
Standard chicken wire stops chickens from getting out but does very little to stop raccoons, weasels, or dogs from getting in — hardware cloth is the actual predator-proofing material.
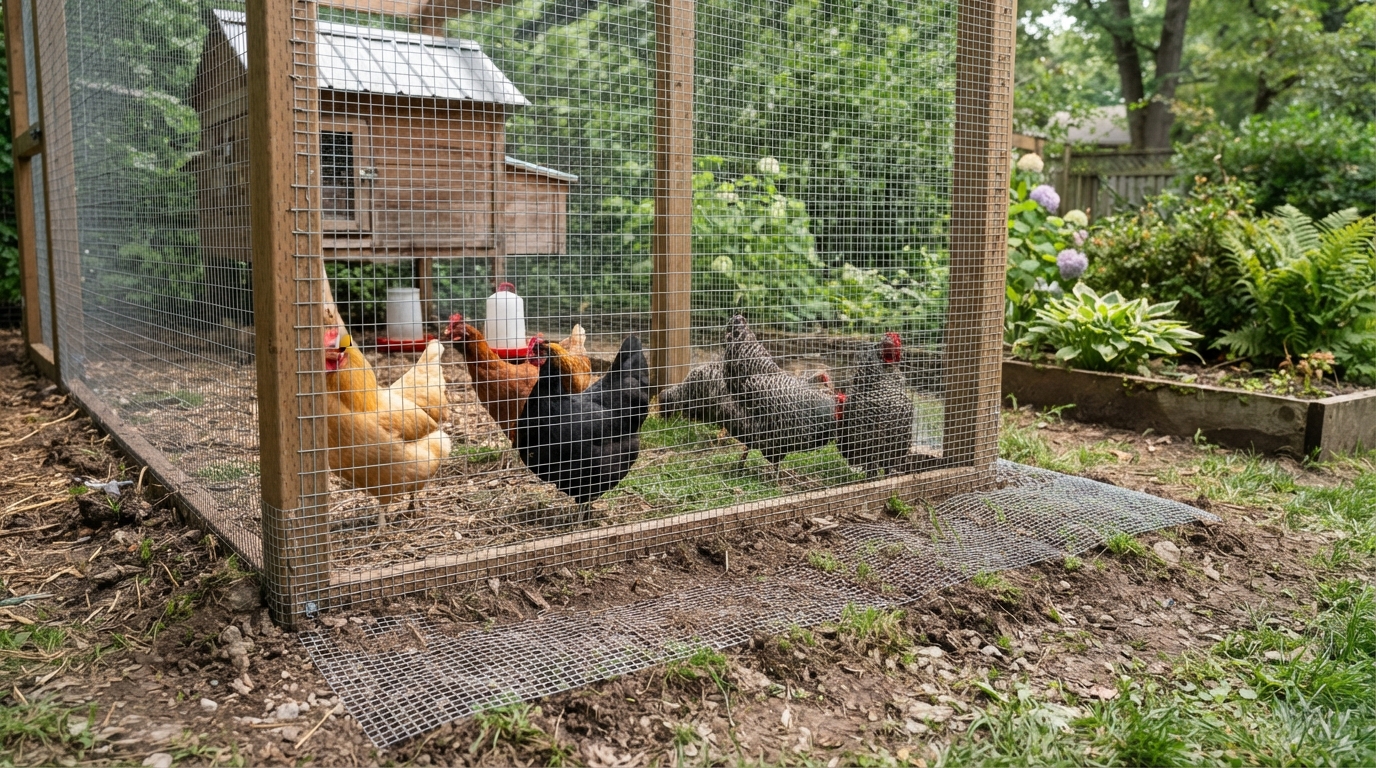
Materials: ½-inch hardware cloth, sized to your run’s perimeter and roughly 3 feet of height plus a 12-inch apron, wire fence staples, a staple gun or fencing pliers, wooden or metal fence posts.
Steps: 1) Attach hardware cloth to posts around the run’s full perimeter, extending from ground level to at least 3 feet high. 2) Bury an additional 12-inch “apron” of hardware cloth flat along the ground, extending outward from the base of the fence, to stop predators from digging underneath (most digging predators dig close to the fence line, not several feet out). 3) Cover the run’s top with hardware cloth or overhead netting if aerial predators (hawks, owls) are a concern in your area.
Cost: Roughly $1.20–$1.80 per linear foot of hardware cloth, so a 10×10 run runs about $60–$100 total. Pro tip: The buried apron is the single most-skipped step and the most common reason a “predator-proof” run gets breached anyway.
7. Cinder Block Root Cellar Storage Box
For anyone without a basement, a simple in-ground cinder block box provides cool, stable storage for root vegetables through winter.
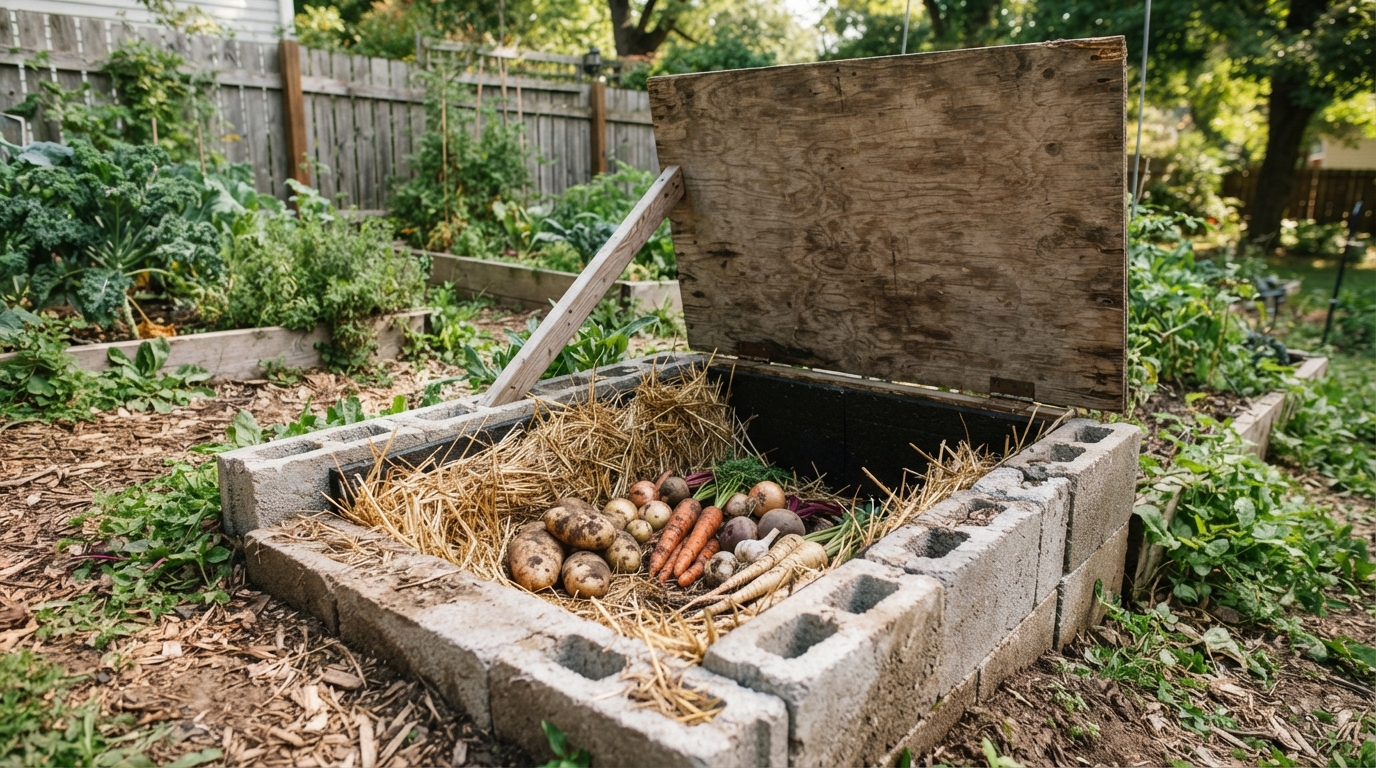
Materials: 20–25 standard cinder blocks ($1.80 each), a sheet of plywood for the lid ($25), exterior hinges ($8), straw or hay for insulation.
Steps: 1) Dig a pit roughly 3 feet deep and 3×3 feet wide in a well-draining spot. 2) Stack cinder blocks dry (no mortar needed) around the pit’s perimeter, up to just above ground level. 3) Line the bottom and sides with a thick layer of straw for insulation. 4) Build a simple plywood lid, hinged on one side, insulated on the underside with another layer of straw stapled to a frame. 5) Store root vegetables (potatoes, carrots, beets) directly in the straw-lined box.
Cost: $70–$90. Pro tip: A location on the north side of a structure, shaded from direct sun, keeps internal temperatures more stable through fall and winter.
8. Cattle Panel Garden Trellis Arch
A cattle panel bent into an arch creates a strong, reusable trellis for vining crops like cucumbers, pole beans, and small squash varieties.
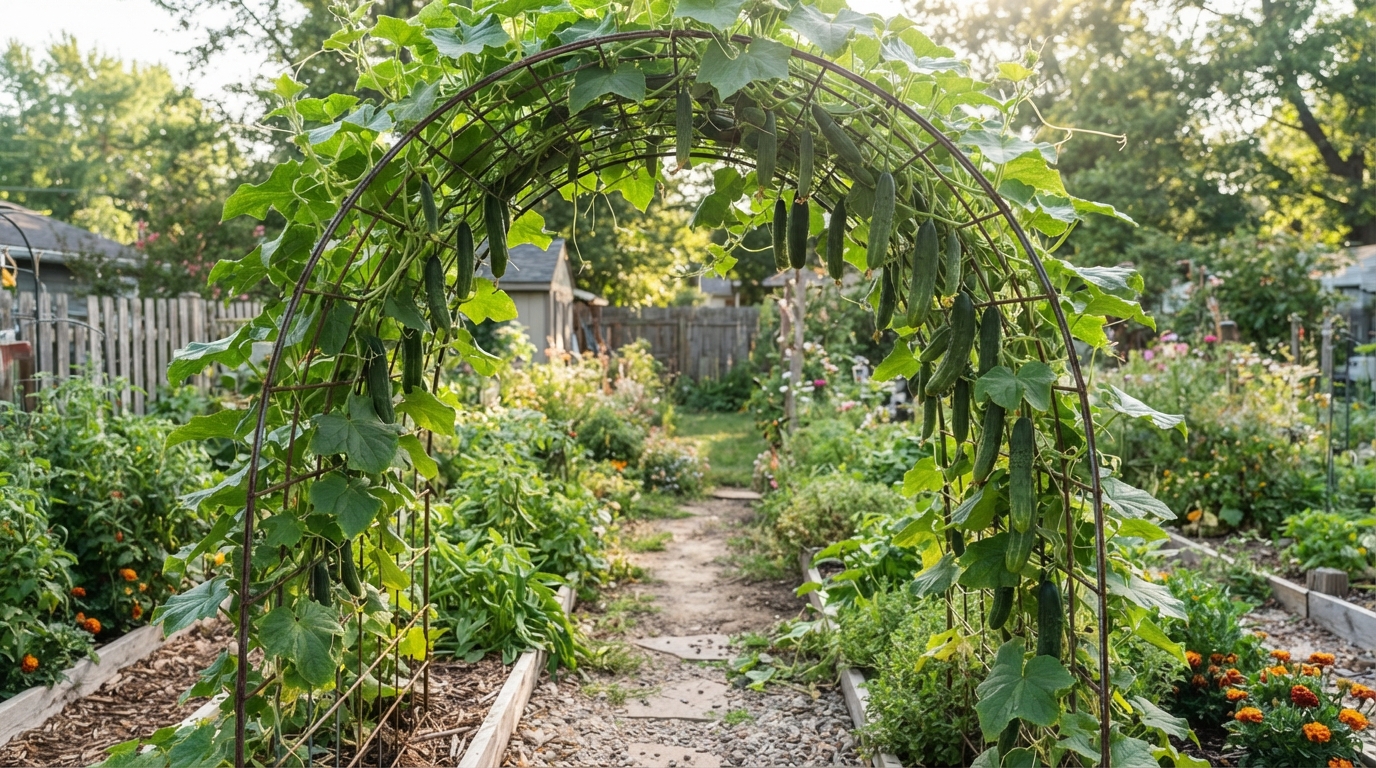
Materials: One 16-foot cattle panel ($30–$40), four 6-foot metal T-posts ($8 each), wire or zip ties.
Steps: 1) Drive two T-posts into the ground on each side of a garden path, about 4 feet apart on each side. 2) Bend the cattle panel into an arch shape and secure each end to the T-posts on either side using wire or heavy zip ties. 3) The finished arch creates a walkable tunnel roughly 4 feet wide and up to 6 feet tall at the peak.
Cost: $60–$75. Pro tip: This structure lasts 10+ years with zero maintenance, unlike wooden trellises that rot within a few seasons.
9. Mobile Chicken Tractor (A-Frame, 4×8 Feet)
A movable, bottomless coop-and-run combo lets chickens access fresh grass daily while fertilizing the lawn as they go, without a fixed run.
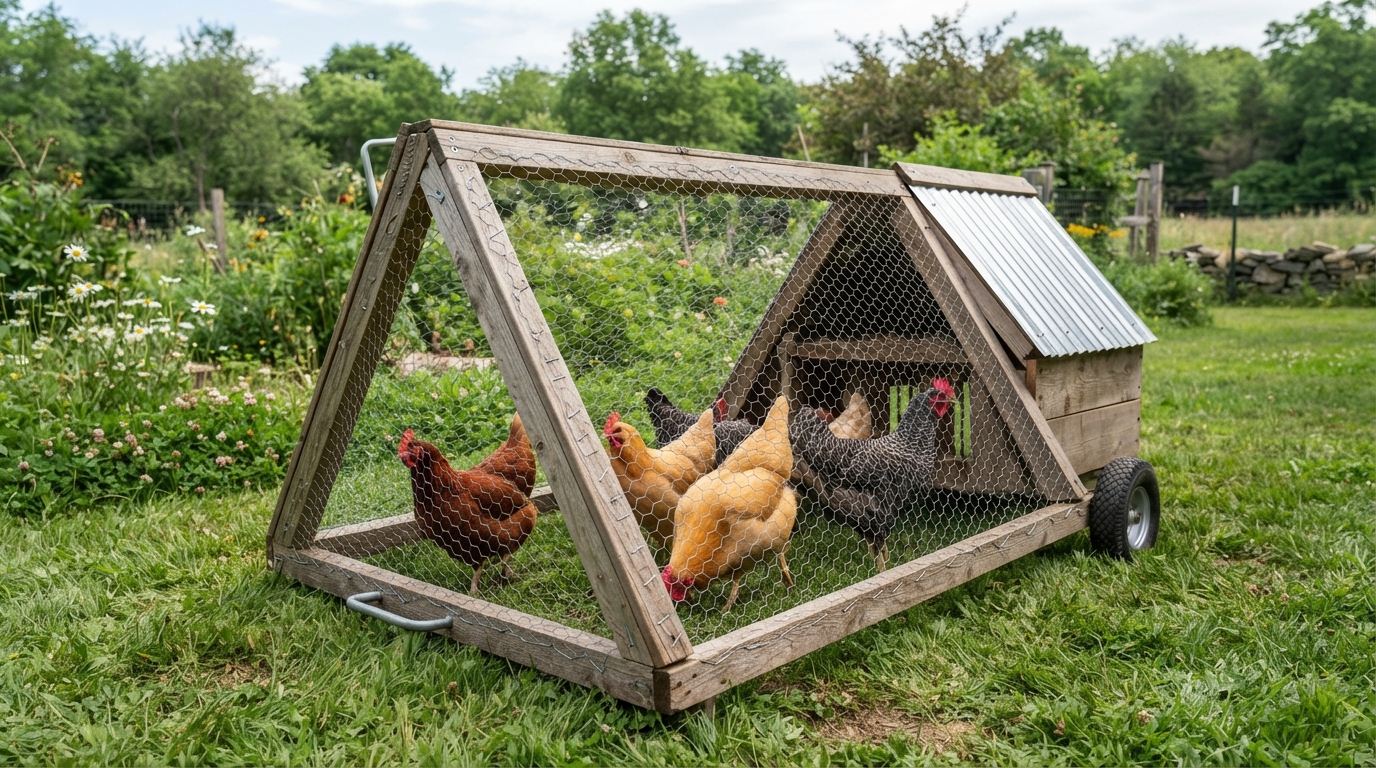
Materials: Eight 2×4 boards, 8 feet long, for the frame; 4×8 sheet of plywood for a partial roof/nesting cover; hardware cloth for the sides; two wheels with axle mounts ($25); handles or a tow bar.
Steps: 1) Build an A-frame using the 2x4s — two triangular end frames connected by long horizontal rails, forming a 4×8 footprint. 2) Cover roughly one-third of the structure with plywood for shade and a nesting area; cover the rest with hardware cloth for ventilation and predator protection. 3) Mount wheels on one end and handles or a tow point on the other, so the structure can be tilted onto the wheels and dragged to a new patch of grass. 4) Leave the bottom completely open so chickens have direct access to fresh ground.
Cost: $150–$220 depending on lumber prices. Pro tip: Move the tractor daily for a small flock (4–6 birds) to prevent the grass underneath from being scratched down to bare dirt.
10. Simple A-Frame Rabbit Hutch
A raised, wire-bottomed hutch keeps rabbits off damp ground and makes manure cleanup dramatically easier than a ground-level enclosure.
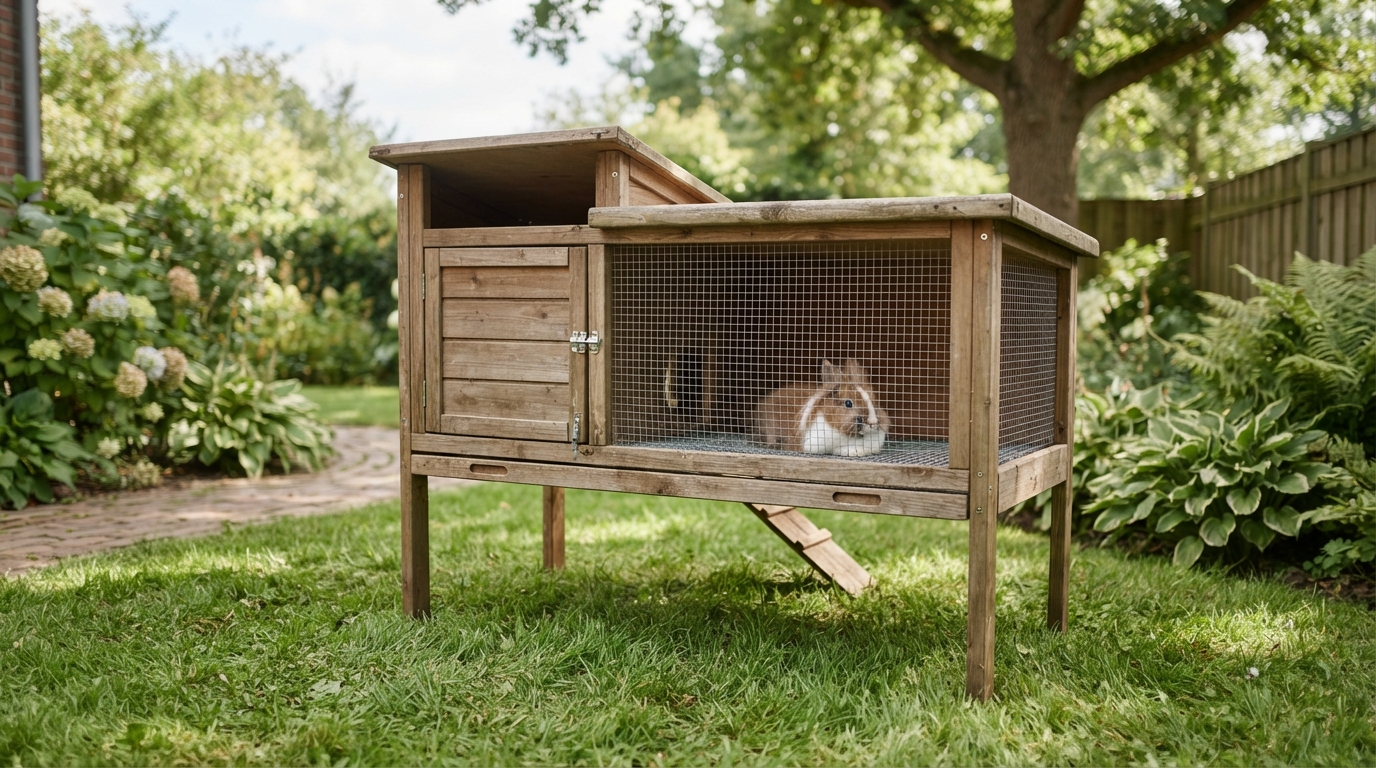
Materials: 2×4 lumber for the frame, ½-inch by 1-inch wire mesh for the floor and sides, plywood for a weatherproof roof and one enclosed nesting section, hinges for an access door.
Steps: 1) Build a rectangular frame roughly 2 feet wide by 4 feet long, raised on 2×4 legs to about 2.5 feet off the ground. 2) Attach wire mesh to the floor (allowing droppings to fall through) and three sides. 3) Enclose one end with plywood as a sheltered nesting box, leaving the rest wire-sided for ventilation. 4) Cap the whole structure with a sloped plywood roof extending a few inches past the frame on all sides for weather protection.
Cost: $90–$130. Pro tip: Position a droppings tray or simply bare ground underneath — rabbit manure is one of the few manures safe to add directly to garden beds without composting first.
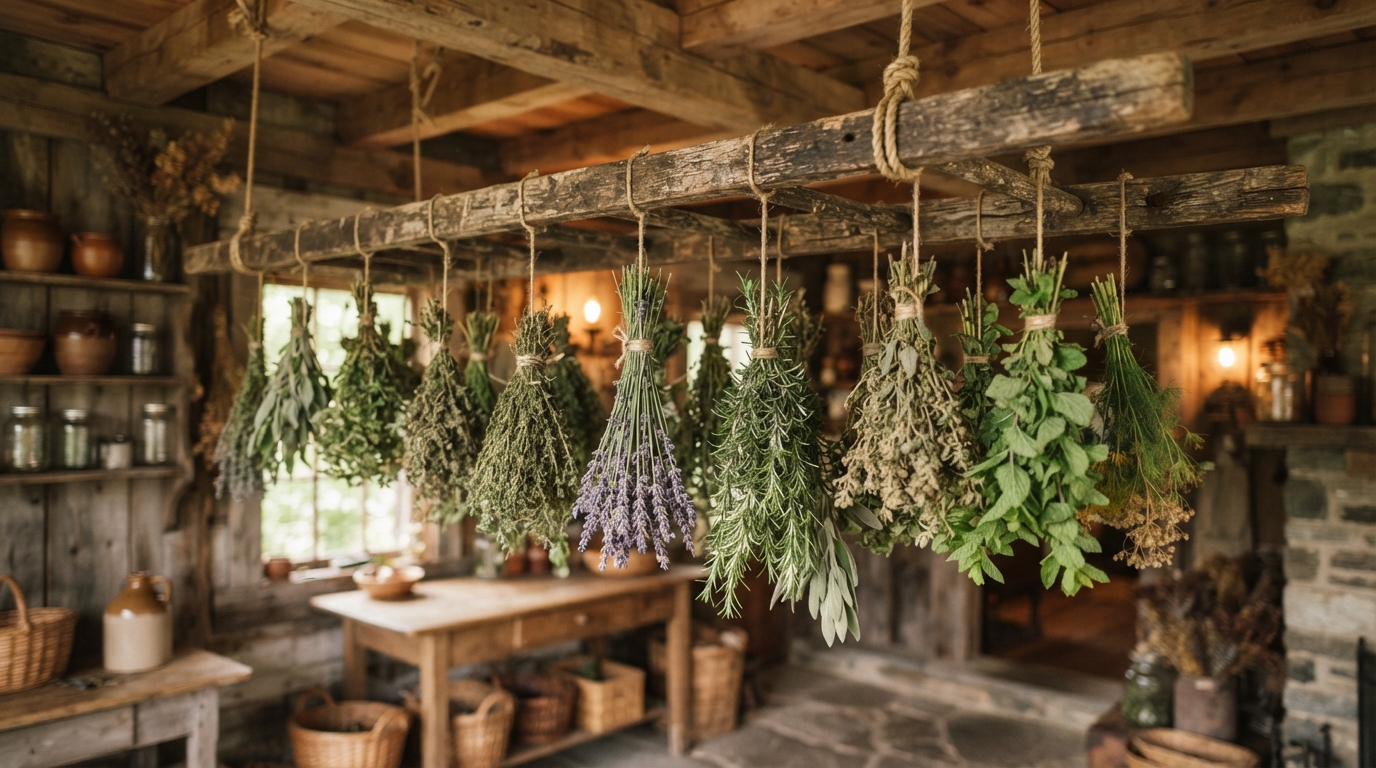
11. Herb Drying Rack From a Wooden Ladder
An old or inexpensive wooden ladder makes a genuinely functional hanging herb drying rack with zero building required beyond hanging it.
Materials: One wooden A-frame ladder or straight ladder ($20–$40 used), twine or S-hooks for bundling herbs.
Steps: 1) Hang the ladder horizontally from a ceiling or beam in a dry, ventilated space (a garage, covered porch, or mudroom) using rope or chain at each end. 2) Bundle herb stems together with twine, 4–6 stems per bundle. 3) Hang bundles upside down from the ladder’s rungs, spaced a few inches apart for airflow.
Cost: $20–$40. Pro tip: Most herbs are fully dry and ready to store in airtight jars within 1–2 weeks in a well-ventilated space.
12. In-Ground Fire Pit With Gravel Drainage Base
A properly built fire pit with a drainage layer avoids the standing-water and mud problems that plague simple dug pits.
Materials: 20–24 fire pit retaining wall blocks ($3–$5 each), a bag of coarse gravel (0.5 cubic yards), a metal fire ring insert ($30–$50, optional but extends the pit’s lifespan).
Steps: 1) Mark and dig a circle roughly 4 feet in diameter and 6 inches deep. 2) Fill the base with 3–4 inches of gravel for drainage. 3) Stack the retaining wall blocks around the perimeter in a circle, 2–3 rows high, staggering the joints between rows for stability (no mortar needed for a standard backyard fire pit). 4) Insert the metal fire ring if using one, centered inside the block circle.
Cost: $100–$180. Pro tip: The gravel base is what actually prevents the pit from turning into a muddy mess after rain — skipping it is the most common reason DIY fire pits fail within a year.
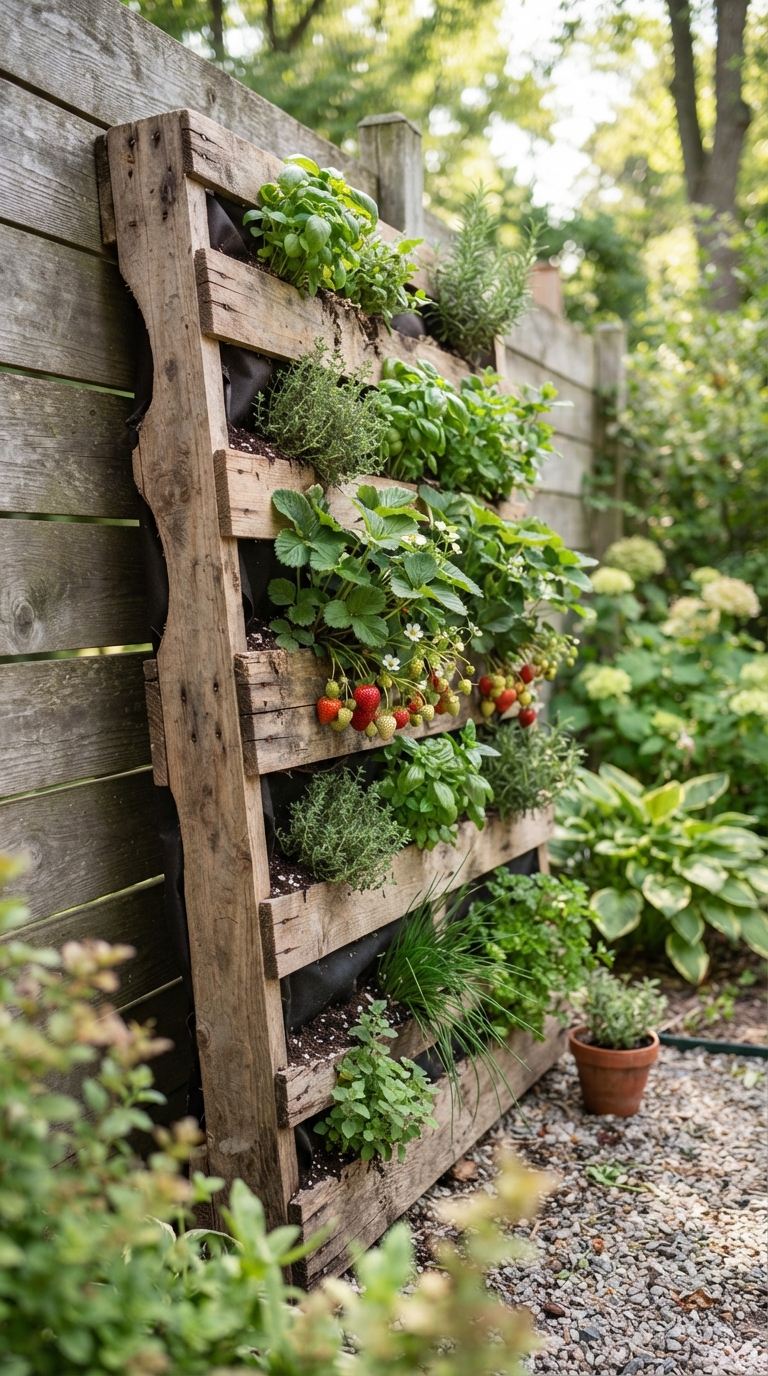
13. Vertical Pallet Planter for Small-Space Growing
A single wooden pallet, stood on end and lined with landscape fabric, creates a vertical growing surface ideal for strawberries, lettuce, or herbs in tight spaces.
Materials: One standard wooden pallet, heavy-duty landscape fabric or a fabric staple gun, potting soil.
Steps: 1) Lay the pallet flat and staple landscape fabric across the back and bottom, and partway up the front, creating a lined pocket in each slat gap. 2) Fill each fabric-lined gap with potting soil, packing firmly. 3) Water thoroughly and let the pallet sit flat for 2–3 weeks, so roots establish and soil settles before standing it upright. 4) Stand the pallet upright against a wall or fence, and plant into the top row directly.
Cost: $15–$25 (pallets are often free). Pro tip: Skipping the flat-and-settle step is the most common reason vertical pallet planters dump their soil out when first stood up.
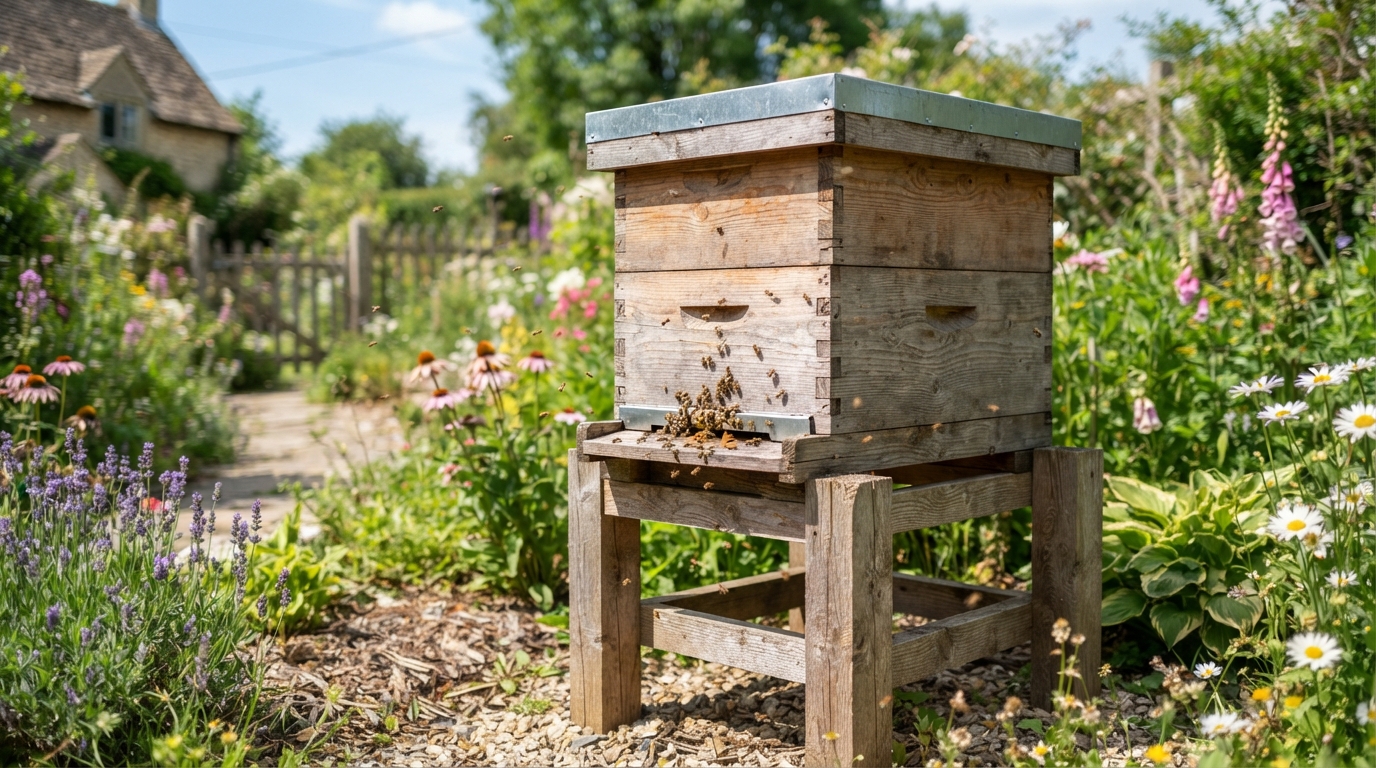
14. Simple Beehive Stand
Elevating a beehive off the ground improves airflow, deters ground moisture and pests, and makes hive inspections easier on your back.
Materials: Four concrete blocks or four 4×4 pressure-treated posts cut to 18 inches, two 2×6 boards cut to the hive’s width plus a few inches of overhang.
Steps: 1) Level the ground where the hive will sit. 2) Position the four blocks or posts as corner supports, roughly matching the hive’s footprint. 3) Lay the two 2×6 boards across the supports, parallel to each other, spaced to match the hive’s base width. 4) Check with a level in both directions before placing the hive — beehives need to be level or very slightly tilted forward (never backward) to allow rainwater to drain out the entrance.
Cost: $30–$50. Pro tip: An 18-inch stand height keeps the hive above most ground moisture and standard grass height while staying comfortable to inspect without excessive bending.
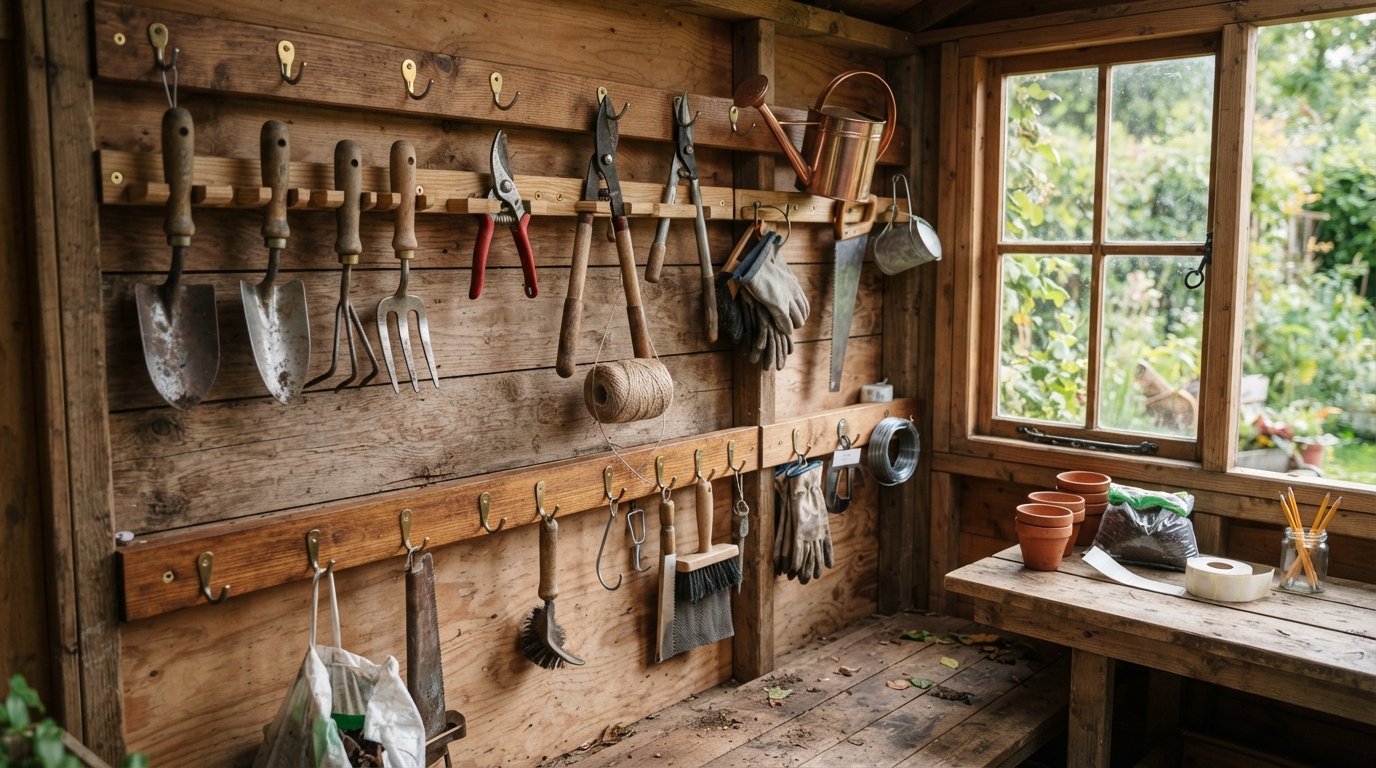
15. Wall-Mounted Tool Organization System (French Cleat)
A French cleat system lets you rearrange and add tool storage indefinitely without redrilling your wall, which fixed pegboards can’t do as easily once tools multiply.
Materials: 1×4 or 1×3 boards ripped at a 45-degree angle on a table saw (or purchased pre-cut cleat strips), wood screws, additional scrap plywood for custom tool holders.
Steps: 1) Cut a board lengthwise at a 45-degree angle to create two matching cleat strips (a jig or table saw with an angled blade is needed for this cut). 2) Screw one strip to the wall horizontally, angled edge facing up and out, at wall-stud locations for weight support. 3) Screw the matching strip to the back of each tool holder or shelf, angled edge facing down and in, so it hooks securely onto the wall-mounted strip. 4) Build simple plywood holders sized to specific tools (shovels, rakes, hoses) and hang them on the wall cleat wherever needed.
Cost: $25–$40 for the wall cleat system itself, plus whatever holders you build. Pro tip: Mount the initial wall cleat at stud locations only — this is what actually holds the weight, not the screws into drywall alone.
Putting These Projects in Order
If you’re starting from scratch, prioritize feed storage (Project 1) and predator-proofing (Project 6) first — these protect what you already have before you invest in anything new. From there, the raised beds (Project 4), compost system (Project 3), and rain barrel (Project 5) form a self-reinforcing loop: compost feeds the beds, rain barrels water them, and kitchen scraps feed the compost. Everything else on this list can be built as time, space, and specific needs (rabbits, bees, a growing tool collection) come up.